


The Ionic Build Process Tutorial
When we start using Ionic, it's all magic, we type three commands and the application is running on our mobile device. From there it all depends of what type of person you are.
Either you don't care how things work and enjoy the dirty high of quickly creating cool hybrid applications or you want to understand what's going behind the scenes before going forward.
I'm from the first group.
In the past, we used to grab some build tools like Grunt or Gulp then some plugins here and there to concatenate, cache, minify, etc. Many hours of work to finally print "Hello world"!
Today with Ionic, just one:
ionic start new-project blank
And we are good to go!
Discovering all the new Ionic tools and UI components really drives me. However, there's one moment when we have to take a step back and understand what's happening to our files when they go through the Ionic black box.
This is a continuous cycle.
Ionic 4 will come with the Stencil compiler. It will work with any framework, which means more complexity. The transformation from an Angular Component (which will be more common) to a Stencil one might differ from a React one.
At the end of the day, there will be a moment when we will have to dive in the new Ionic build process to see how the Ionic Components are transformed.
In this tutorial, we will go step by step through the actual Ionic's build process:
- Creating the web files
- Creating the platform files
- Impacting this process
The first step is transforming the TypeScript and SCSS files located in the src folder to JavaScript and CSS files.
Those files will be moved to the www folder as follow:
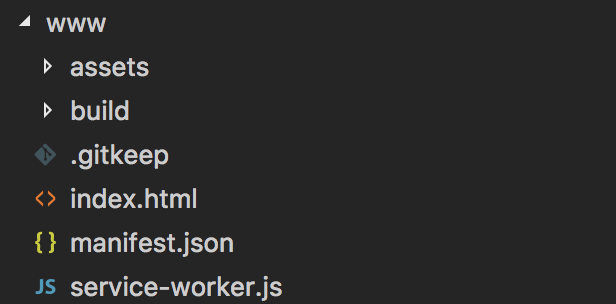
This is the traditional Angular process.
We can typically grab those files and use them in a web application 👍.
The most interesting folder here is the build folder:
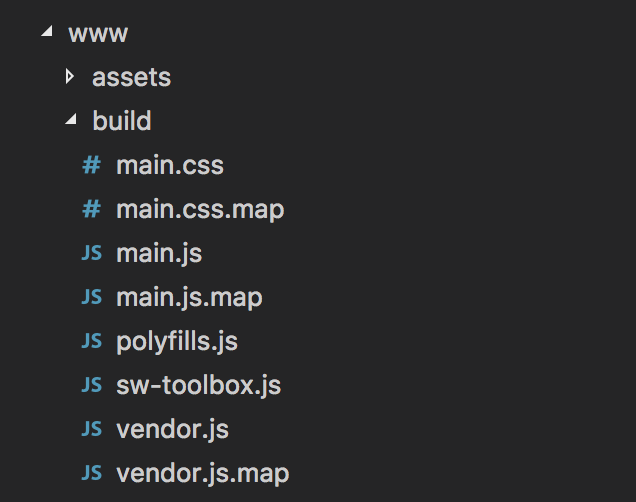
The application's src TypeScript files are all compiled, concatenated and minified in the main.js file.
This leads to some very ugly file:
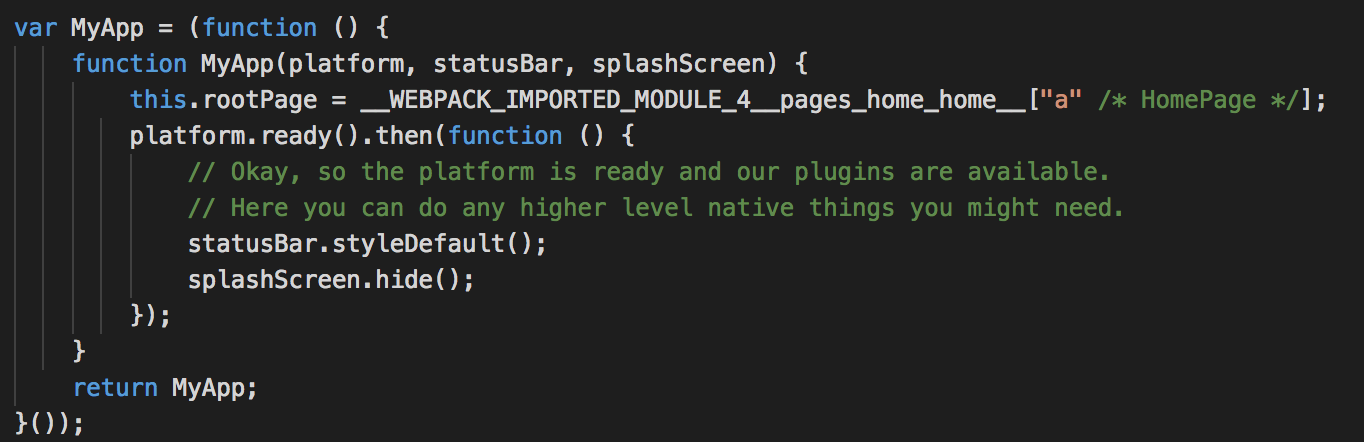 But hey! We generally don't need to come here.
If the application doesn't load one of your file, take a detour here to check that it's correctly added.
Template wise, the HTML files are also located in the main.js file:

The other important JavaScript file here is vendor.js.
The node_modules libraries are all compressed there, but not all of them. This is done thanks to the Tree Shaking mechanism. Webpack will look for some dead code, if a library isn't exported anywhere, it won't be added to the vendor.js file.
The last part of our code is the SCSS.
Everything (node_modules + src) is imported in one big main.css file.
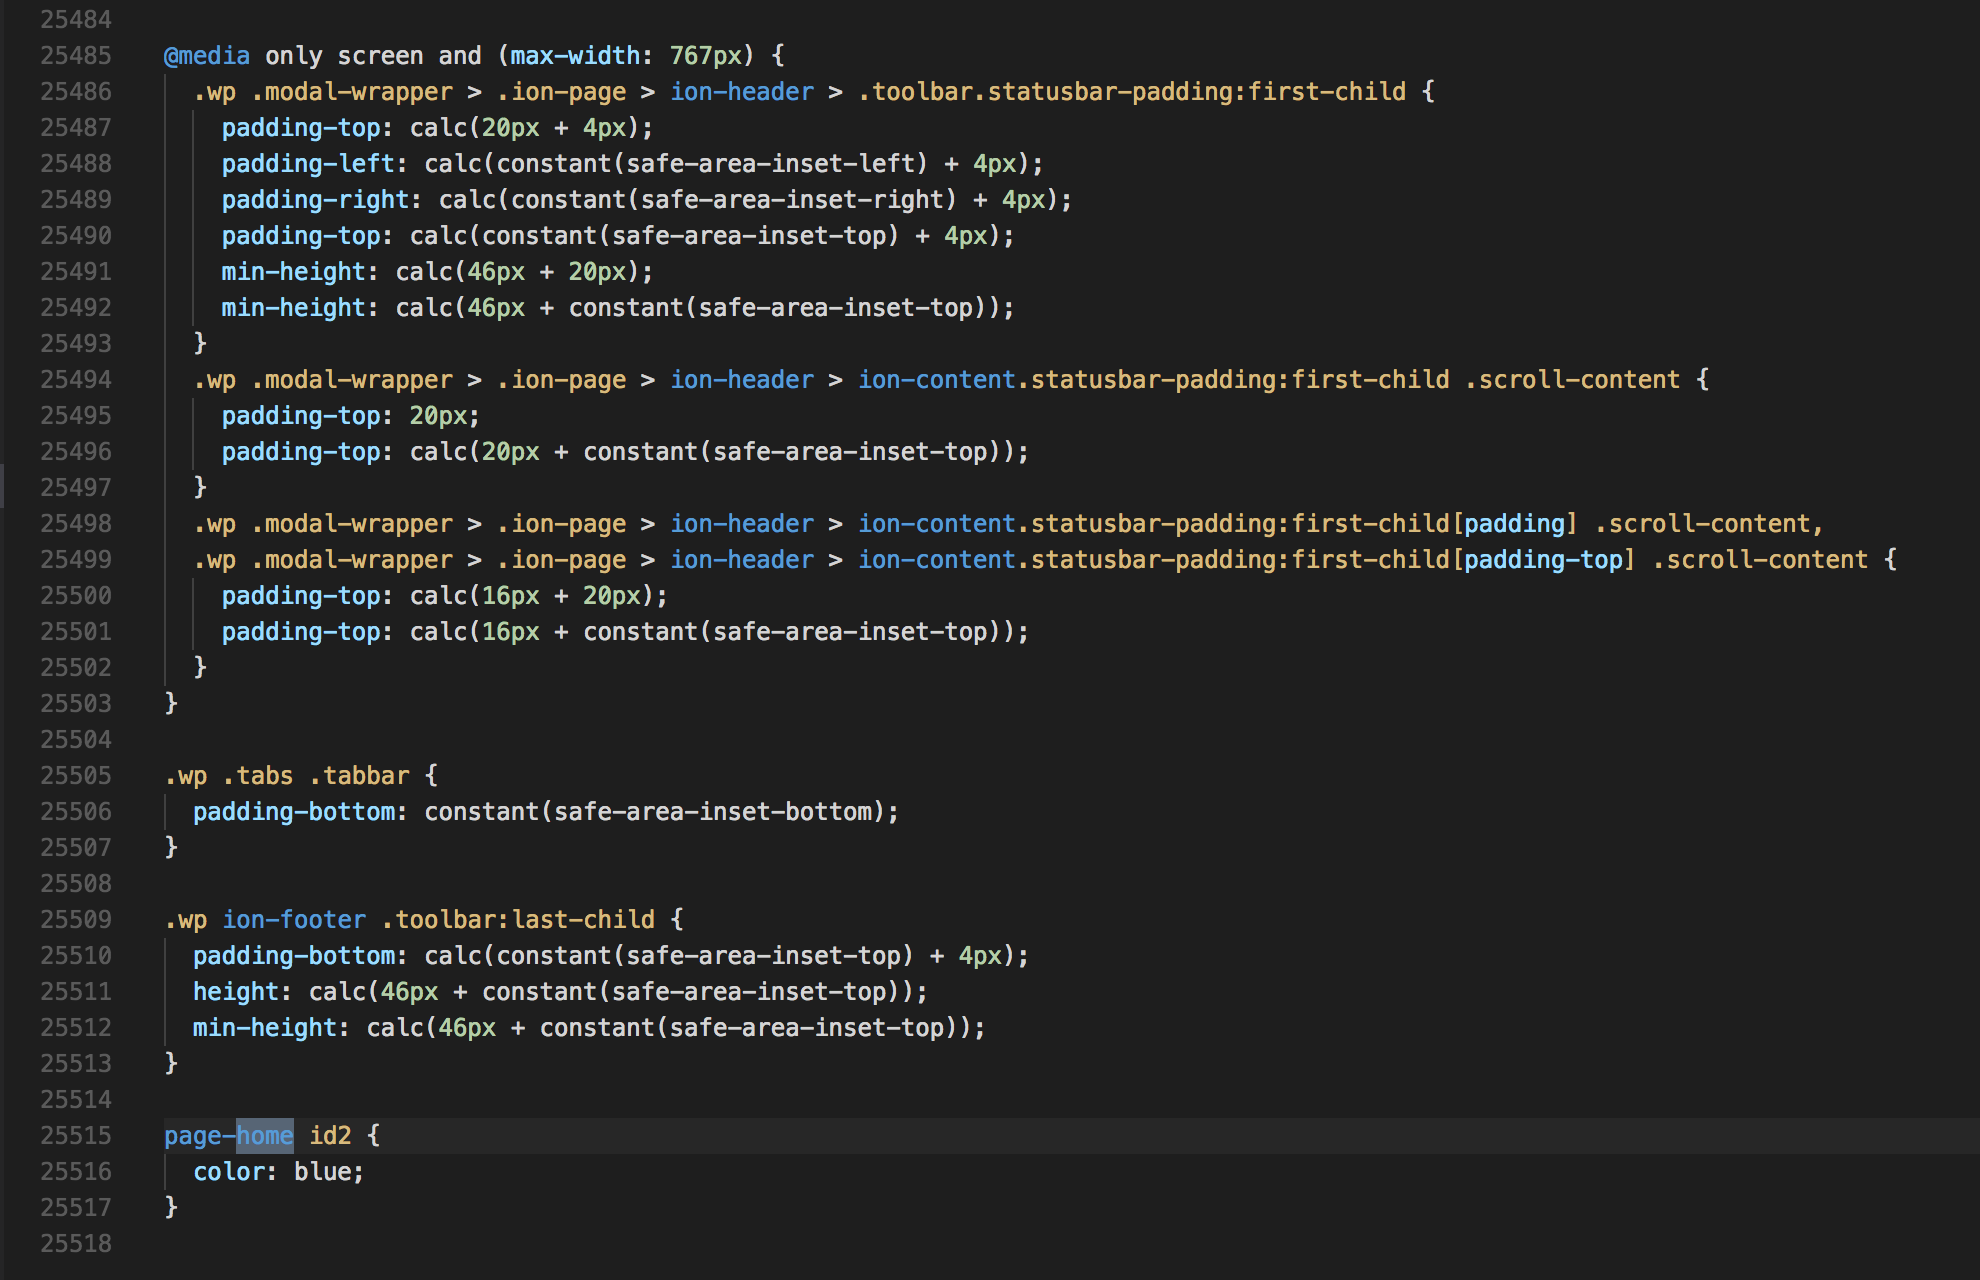
25k lines of css, that's the price to pay for cross-platforming ...
That's for the web part.
Now the mobile phase.
Android
We start by adding the platform:
ionic cordova platform add android
Similarly to the web build process, this command will create a new folder for Android in the platforms folder.
The www folder is the end result:

The www/build folder will contain our compiled Ionic files.
The Cordova plugins will be added to the plugins folder.
The cordova_plugins.js file will contain information about the Cordova and Ionic plugins present in the project:
cordova.define("cordova/plugin_list", function(require, exports, module) {
  module.exports = [
    {
      id: "cordova-plugin-device.device",
      file: "plugins/cordova-plugin-device/www/device.js",
      pluginId: "cordova-plugin-device",
      clobbers: ["device"]
    },
    {
      id: "cordova-plugin-splashscreen.SplashScreen",
      file: "plugins/cordova-plugin-splashscreen/www/splashscreen.js",
      pluginId: "cordova-plugin-splashscreen",
      clobbers: ["navigator.splashscreen"]
    },
    {
      id: "cordova-plugin-statusbar.statusbar",
      file: "plugins/cordova-plugin-statusbar/www/statusbar.js",
      pluginId: "cordova-plugin-statusbar",
      clobbers: ["window.StatusBar"]
    },
    {
      id: "ionic-plugin-keyboard.keyboard",
      file: "plugins/ionic-plugin-keyboard/www/android/keyboard.js",
      pluginId: "ionic-plugin-keyboard",
      clobbers: ["cordova.plugins.Keyboard"],
      runs: true
    }
  ];
  module.exports.metadata =
    // TOP OF METADATA
    {
      "cordova-plugin-device": "1.1.4",
      "cordova-plugin-ionic-webview": "1.1.15",
      "cordova-plugin-splashscreen": "4.0.3",
      "cordova-plugin-statusbar": "2.2.4-dev",
      "cordova-plugin-whitelist": "1.3.1",
      "ionic-plugin-keyboard": "2.2.1"
    };
  // BOTTOM OF METADATA
});
And the android.json too:
{
  "prepare_queue": {
    "installed": [],
    "uninstalled": []
  },
  "config_munge": {
    "files": {
      "res/xml/config.xml": {
        "parents": {
          "/*": [
            {
              "xml":
                "<feature name=\"Device\"><param name=\"android-package\"
                          value=\"org.apache.cordova.device.Device\" /></feature>",
              "count": 1
            },
            {
              "xml":
                "<feature name=\"SplashScreen\">
                <param name=\"android-package\"
                value=\"org.apache.cordova.splashscreen.SplashScreen\" />
                <param name=\"onload\" value=\"true\" /></feature>",
              "count": 1
            },
            {
              "xml":
                "<feature name=\"StatusBar\">
                <param name=\"android-package\"
                value=\"org.apache.cordova.statusbar.StatusBar\" />
                <param name=\"onload\" value=\"true\" /></feature>",
              "count": 1
            },
            {
              "xml":
                "<feature name=\"Whitelist\">
                <param name=\"android-package\"
                value=\"org.apache.cordova.whitelist.WhitelistPlugin\" />
                <param name=\"onload\" value=\"true\" /></feature>",
              "count": 1
            },
            {
              "xml":
                "<feature name=\"Keyboard\">
                <param name=\"android-package\"
                value=\"io.ionic.keyboard.IonicKeyboard\" />
                <param name=\"onload\" value=\"true\" /></feature>",
              "count": 1
            }
          ]
        }
      }
    }
  },
  "installed_plugins": {
    "cordova-plugin-device": {
      "PACKAGE_NAME": "io.ionic.starter"
    },
    "cordova-plugin-ionic-webview": {
      "PACKAGE_NAME": "io.ionic.starter"
    },
    "cordova-plugin-splashscreen": {
      "PACKAGE_NAME": "io.ionic.starter"
    },
    "cordova-plugin-statusbar": {
      "PACKAGE_NAME": "io.ionic.starter"
    },
    "cordova-plugin-whitelist": {
      "PACKAGE_NAME": "io.ionic.starter"
    },
    "ionic-plugin-keyboard": {
      "PACKAGE_NAME": "io.ionic.starter"
    }
  },
  "dependent_plugins": {},
  "modules": [
    {
      "id": "cordova-plugin-device.device",
      "file": "plugins/cordova-plugin-device/www/device.js",
      "pluginId": "cordova-plugin-device",
      "clobbers": ["device"]
    },
    {
      "id": "cordova-plugin-splashscreen.SplashScreen",
      "file": "plugins/cordova-plugin-splashscreen/www/splashscreen.js",
      "pluginId": "cordova-plugin-splashscreen",
      "clobbers": ["navigator.splashscreen"]
    },
    {
      "id": "cordova-plugin-statusbar.statusbar",
      "file": "plugins/cordova-plugin-statusbar/www/statusbar.js",
      "pluginId": "cordova-plugin-statusbar",
      "clobbers": ["window.StatusBar"]
    },
    {
      "id": "ionic-plugin-keyboard.keyboard",
      "file": "plugins/ionic-plugin-keyboard/www/android/keyboard.js",
      "pluginId": "ionic-plugin-keyboard",
      "clobbers": ["cordova.plugins.Keyboard"],
      "runs": true
    }
  ],
  "plugin_metadata": {
    "cordova-plugin-device": "1.1.4",
    "cordova-plugin-ionic-webview": "1.1.15",
    "cordova-plugin-splashscreen": "4.0.3",
    "cordova-plugin-statusbar": "2.2.4-dev",
    "cordova-plugin-whitelist": "1.3.1",
    "ionic-plugin-keyboard": "2.2.1"
  }
}
If a plugin is missing when the Ionic application is running, those are a great places to investigate.
There's another platform_www folder that is quite similar to the www folder.
Cordova's building tool uses this folder as a temporary folder before creating the www folder.
We can now build for the device:
ionic cordova build android
We will only care about those new files:
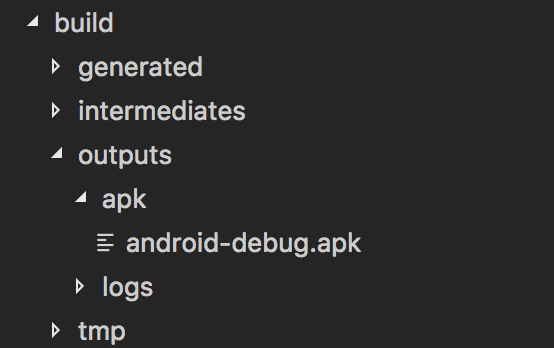
Particularly the outputs folder and the android-debug.apk file because that's our end result!
This is a debug version of the application, to get a release one use:
cordova build android --release
iOS
Adding the platform:
ionic cordova platform add ios
A new ios folder is created in the platforms folders.
We still have the www and platform_www folders:

We have the ios.json file which is the equivalent of the android.json file:
{
  "prepare_queue": {
    "installed": [],
    "uninstalled": []
  },
  "config_munge": {
    "files": {
      "config.xml": {
        "parents": {
          "/*": [
            {
              "xml":
                "<feature name=\"Device\"><param name=\"ios-package\"
                          value=\"CDVDevice\" /></feature>",
              "count": 1
            },
            {
              "xml": "<allow-navigation href=\"http://localhost:8080/*\" />",
              "count": 1
            },
            {
              "xml":
                "<feature name=\"CDVWKWebViewEngine\">
                <param name=\"ios-package\"
                       value=\"CDVWKWebViewEngine\" /></feature>",
              "count": 1
            },
            {
              "xml":
                "<preference name=\"CordovaWebViewEngine\"
                             value=\"CDVWKWebViewEngine\" />",
              "count": 1
            },
            {
              "xml":
                "<feature name=\"SplashScreen\">
                <param name=\"ios-package\" value=\"CDVSplashScreen\" />
                <param name=\"onload\" value=\"true\" /></feature>",
              "count": 1
            },
            {
              "xml":
                "<feature name=\"StatusBar\">
                <param name=\"ios-package\" value=\"CDVStatusBar\" />
                <param name=\"onload\" value=\"true\" /></feature>",
              "count": 1
            },
            {
              "xml":
                "<preference name=\"StatusBarOverlaysWebView\" value=\"true\" />",
              "count": 1
            },
            {
              "xml":
                "<preference name=\"StatusBarStyle\" value=\"lightcontent\" />",
              "count": 1
            },
            {
              "xml":
                "<feature name=\"Keyboard\">
                <param name=\"ios-package\" onload=\"true\"
                       value=\"IonicKeyboard\" />
                </feature>",
              "count": 1
            }
          ]
        }
      }
    }
  },
  "installed_plugins": {
    "cordova-plugin-device": {
      "PACKAGE_NAME": "io.ionic.starter"
    },
    "cordova-plugin-ionic-webview": {
      "PACKAGE_NAME": "io.ionic.starter"
    },
    "cordova-plugin-splashscreen": {
      "PACKAGE_NAME": "io.ionic.starter"
    },
    "cordova-plugin-statusbar": {
      "PACKAGE_NAME": "io.ionic.starter"
    },
    "cordova-plugin-whitelist": {
      "PACKAGE_NAME": "io.ionic.starter"
    },
    "ionic-plugin-keyboard": {
      "PACKAGE_NAME": "io.ionic.starter"
    }
  },
  "dependent_plugins": {},
  "modules": [
    {
      "id": "cordova-plugin-device.device",
      "file": "plugins/cordova-plugin-device/www/device.js",
      "pluginId": "cordova-plugin-device",
      "clobbers": ["device"]
    },
    {
      "id": "cordova-plugin-ionic-webview.ios-wkwebview-exec",
      "file":
        "plugins/cordova-plugin-ionic-webview/src/www/ios/ios-wkwebview-exec.js",
      "pluginId": "cordova-plugin-ionic-webview",
      "clobbers": ["cordova.exec"]
    },
    {
      "id": "cordova-plugin-splashscreen.SplashScreen",
      "file": "plugins/cordova-plugin-splashscreen/www/splashscreen.js",
      "pluginId": "cordova-plugin-splashscreen",
      "clobbers": ["navigator.splashscreen"]
    },
    {
      "id": "cordova-plugin-statusbar.statusbar",
      "file": "plugins/cordova-plugin-statusbar/www/statusbar.js",
      "pluginId": "cordova-plugin-statusbar",
      "clobbers": ["window.StatusBar"]
    },
    {
      "id": "ionic-plugin-keyboard.keyboard",
      "file": "plugins/ionic-plugin-keyboard/www/ios/keyboard.js",
      "pluginId": "ionic-plugin-keyboard",
      "clobbers": ["cordova.plugins.Keyboard"],
      "runs": true
    }
  ],
  "plugin_metadata": {
    "cordova-plugin-device": "1.1.4",
    "cordova-plugin-ionic-webview": "1.1.15",
    "cordova-plugin-splashscreen": "4.0.3",
    "cordova-plugin-statusbar": "2.2.4-dev",
    "cordova-plugin-whitelist": "1.3.1",
    "ionic-plugin-keyboard": "2.2.1"
  }
}
We now have a MyApp folder:
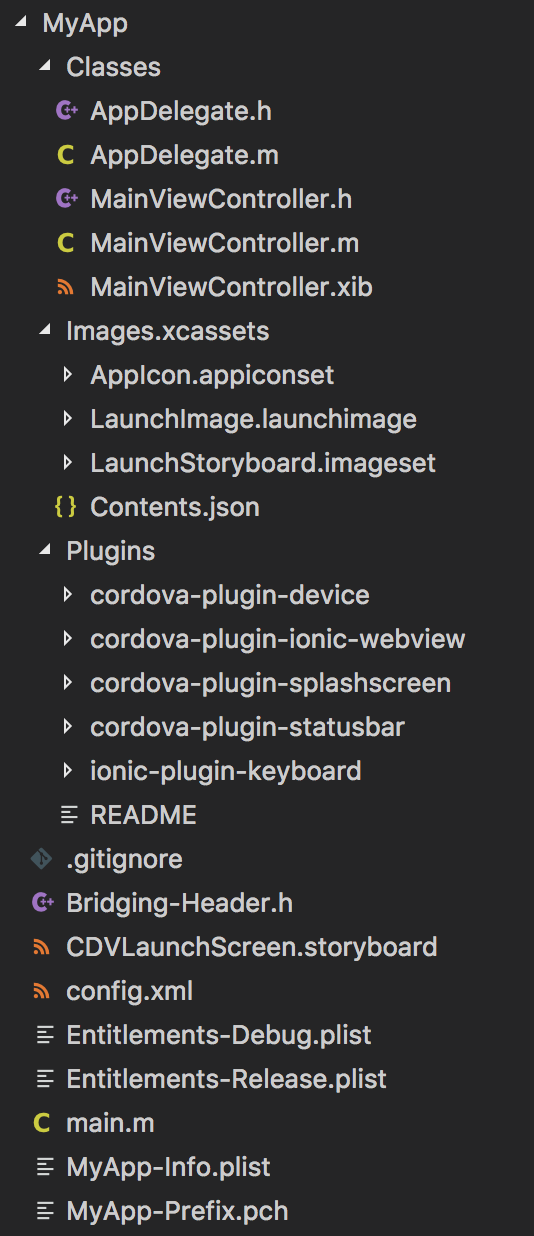
Many Objective C (.h, .m) files.
We have another Plugins folder for the Cordova and Ionic plugins.
And the holy grail:

This is the Xcode project that we can import:

Ok, we know more about Ionic’s build process now!
However, can we impact it?
The answer is yes!
Scripts and Hooks
Two ways to impact this process.
The first is the “scripts” field in the package.json file.
Ionic’s build process is handled by an ionic-app-scripts plugin which uses npm commands for the job.
There are default npm actions in an Ionic project (clean, build, etc.).
We can chain a script call or even override an action, like this:
  ...
  "scripts": {
    "clean": "ionic-app-scripts clean",
    "build": "sh prebuild.sh;ionic-app-scripts build",
    "lint": "ionic-app-scripts lint",
    "ionic:build": "ionic-app-scripts build && whateverYouWantToUse",
    "ionic:serve": "ionic-app-scripts serve"
  }
  ...
The other possibility is talking to Cordova.
Hooks allow us to run scripts at different stages of Cordova’s build process. There are more than 30 hook types. They allow us to run scripts at different time like:
- Before/after a platform is added
- Before/after a platform is removed
- Before/after the application is compiled
By adding this line to the config.xml file:
<hook type="before_platform_add" src="hooks/perf.js" />
A perf.js script located in the hooks folder will be executed before a new platform is added.The hook list is available at the official documentation.
Conclusion
There’s a lot of things happening!
You might not need to know everything inside this tutorial for your current and future Ionic projects (and I hope you won’t).
However, if things start to become complicated and you feel lost, you can come back here to understand what is going on under the hood.
At the end of the day, Ionic’s build process is focused on first creating the web files then moving them to the targeted platform.