


Using React in an Ionic application in One Go
So ... we already know how to use Angular and Vue with Ionic 4.
The only one left is React!
And we do it the React way with JSX files.
Let's start with the traditional:
ionic start ionic-react-app blank --type=angular
(maybe one day --type=react)
We then add the React core libraries:
yarn add -S react react-dom
As usual since Ionic 4 is Angular-oriented, we need to make some changes that will allow us to use JSX files.
The first step is to add a custom Webpack configuration to the current one, if you don't know how to do this, just head there.
The current Ionic stack is missing some vitals plugins for React, so we install them:
yarn add -S babel-loader babel-preset-react
Those libraries will allow us to transform our JSX to JS so the browser can understand what's going on.
They are used in the extra-webpack.config.js file:
const reactRule = [{
  test: /\.jsx$/,
  loader: "babel-loader",
  options: {
    presets: ['react']
  }
}];

module.exports = {
  module: {
    rules: reactRule
  }
}
We tell Webpack that if it finds a file with the .jsx extension, the babel-loader should be used with the react preset.
And that's it for the boring stuff!
Now we can dive in the application, starting with the index.html file:
<!doctype html>
<html lang="en">
<head>
  <meta charset="utf-8">
  <title>Ionic App</title>

  <base href="/" />

  <meta name="viewport"
        content="viewport-fit=cover, width=device-width,
                 initial-scale=1.0, minimum-scale=1.0,
                 maximum-scale=1.0, user-scalable=no">
  <meta name="format-detection" content="telephone=no">
  <meta name="msapplication-tap-highlight" content="no">

  <link rel="icon" type="image/png" href="assets/icon/favicon.png">
  <script src="https://unpkg.com/@ionic/[email protected]/dist/ionic.js"></script>

  <!-- add to homescreen for ios -->
  <meta name="apple-mobile-web-app-capable" content="yes">
  <meta name="apple-mobile-web-app-status-bar-style" content="black">
</head>
<body>
  <div id="root"></div>
</body>
</html>
The "root" id is where React will render.
This bootstrapping phase is done in the main.jsx file:
import React, { Component } from "react";
import ReactDOM from "react-dom";
import SimpleReactComponent from "./app/SimpleReactComponent.jsx";

ReactDOM.render(
    <SimpleReactComponent/>
  ,document.getElementById("root")
);
This is classic React, we use the ReactDOM library for rendering and look for the "root" id on the page.
We can pass any element as the first argument of the render method, so we are going to use a React Component named SimpleReactComponent which is as follow:
import React from 'react';

const Component = props => {
  return (
    <div>
      Just a React Component
    </div>
  );
};

export default Component;
And Voila React and Ionic 4 working together!

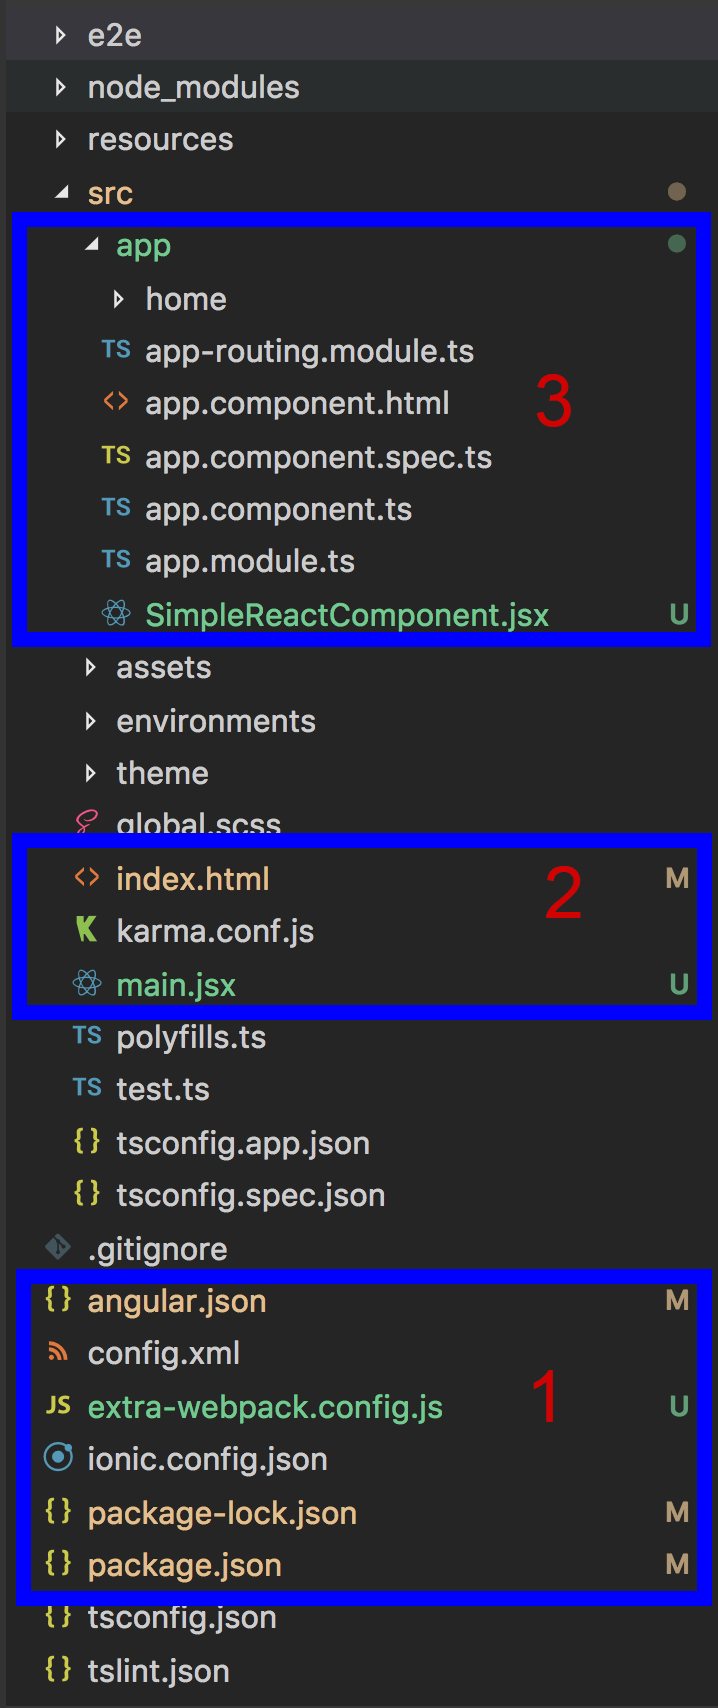
Here is an image summing up the file architecture and the steps to proceed: