Using Redux Template-Driven Forms With Ionic in One Go
We have already seen what Template-Driven Forms are and how to use them with Angular in a previous tutorial.
In this one we take another approach by coupling it with Redux in an Ionic application. You should have a look at the Redux introduction and the time travel tutorial if you are not familiar with this new technology.
As usual we install the libraries:
npm i --save redux redux-logger @angular-redux/form @angular-redux/store
We start by adding importing the Modules in the app.module.ts file:
import { FormsModule } from '@angular/forms';

import { NgReduxModule } from '@angular-redux/store';
import { NgReduxFormModule } from '@angular-redux/form';

@NgModule({
  ...
  imports: [
    BrowserModule,
    IonicModule.forRoot(MyApp),
    FormsModule,
    NgReduxFormModule,
    NgReduxModule
  ],
  providers: [
    StatusBar,
    SplashScreen,
    {provide: ErrorHandler, useClass: IonicErrorHandler}
  ]
})
export class AppModule {}
- FormsModule is Angular's module for creating template-driven forms
- NgReduxModule is Redux Core Angular module
- NgReduxFormModule is the extension for the forms feature
The home.html form is very similar to a normal template-driven one:
  <form #userForm="ngForm" connect="myForm" (ngSubmit)="onFormSubmitted()">

    <div>
      <label>
        <span>Name</span>
        <input type="text" name="name"
               placeholder="Name" ngControl ngModel required>
      </label>
    </div>

    <div>
      <label>
        <span>Email</span>
        <input type="email" name="email" placeholder="Email"
               ngControl ngModel required>
      </label>
    </div>

    <div ngModelGroup="address">

      <div>
        <label>
          <span>Country</span>
          <input type="text" name="country" placeholder="Country"
                 ngControl ngModel required>
        </label>
      </div>

      <div>
        <label>
          <span>City</span>
          <input type="text" name="city" placeholder="City"
                 ngControl ngModel required>
        </label>
      </div>

    </div>

    <input type="submit" [disabled]="userForm.invalid">

  </form>
Two differences here:
- The connect Directive: Generally a directive accepts a property like user, data, etc. This one will go through the Redux Store and grab the myForm field from the current state (like a select would)
- The onFormSubmitted method: We don't need to pass the form here. This method will work with the Redux Store's state
Moving on to the home.ts file, starting with the imports and injections:
...
import { defaultFormReducer} from '@angular-redux/form';
import { NgRedux, DevToolsExtension } from '@angular-redux/store';

declare var require;

var reduxLogger = require('redux-logger');

@Component({
  selector: 'page-home',
  templateUrl: 'home.html'
})
export class HomePage {

  constructor(public store: NgRedux<any>, public devTools: DevToolsExtension) {
  ...
  }
}
The defaultFormReducer contains the angular-redux form basic reducer. It handles the FORM_CHANGED action and updates the Redux Store for us.
As usual, the store and devTools Providers are injected.
The Store's INITIAL_STATE is then created:
  constructor(public store: NgRedux<any>, public devTools: DevToolsExtension) {

    const INITIAL_STATE = {
      myForm: {
        name: '',
        email: '',
        address: {
          country: '',
          city: ''
        }
      }
    };
    ...
  }
The angular-redux form's connect directive will look for the myForm field then go through each sub-fields to map them to the ngControls and the address ngModelGroup.
Finally the store is configured:
    this.store.configureStore(
      defaultFormReducer(),
      INITIAL_STATE,
      [reduxLogger.createLogger()],
      devTools.isEnabled() ? [devTools.enhancer()] : []);
  }
Not forgetting the last touch, which is the onFormSubmitted method:
  onFormSubmitted() {
    console.log(this.store.getState());
    // Do the work here
  }
And voila!
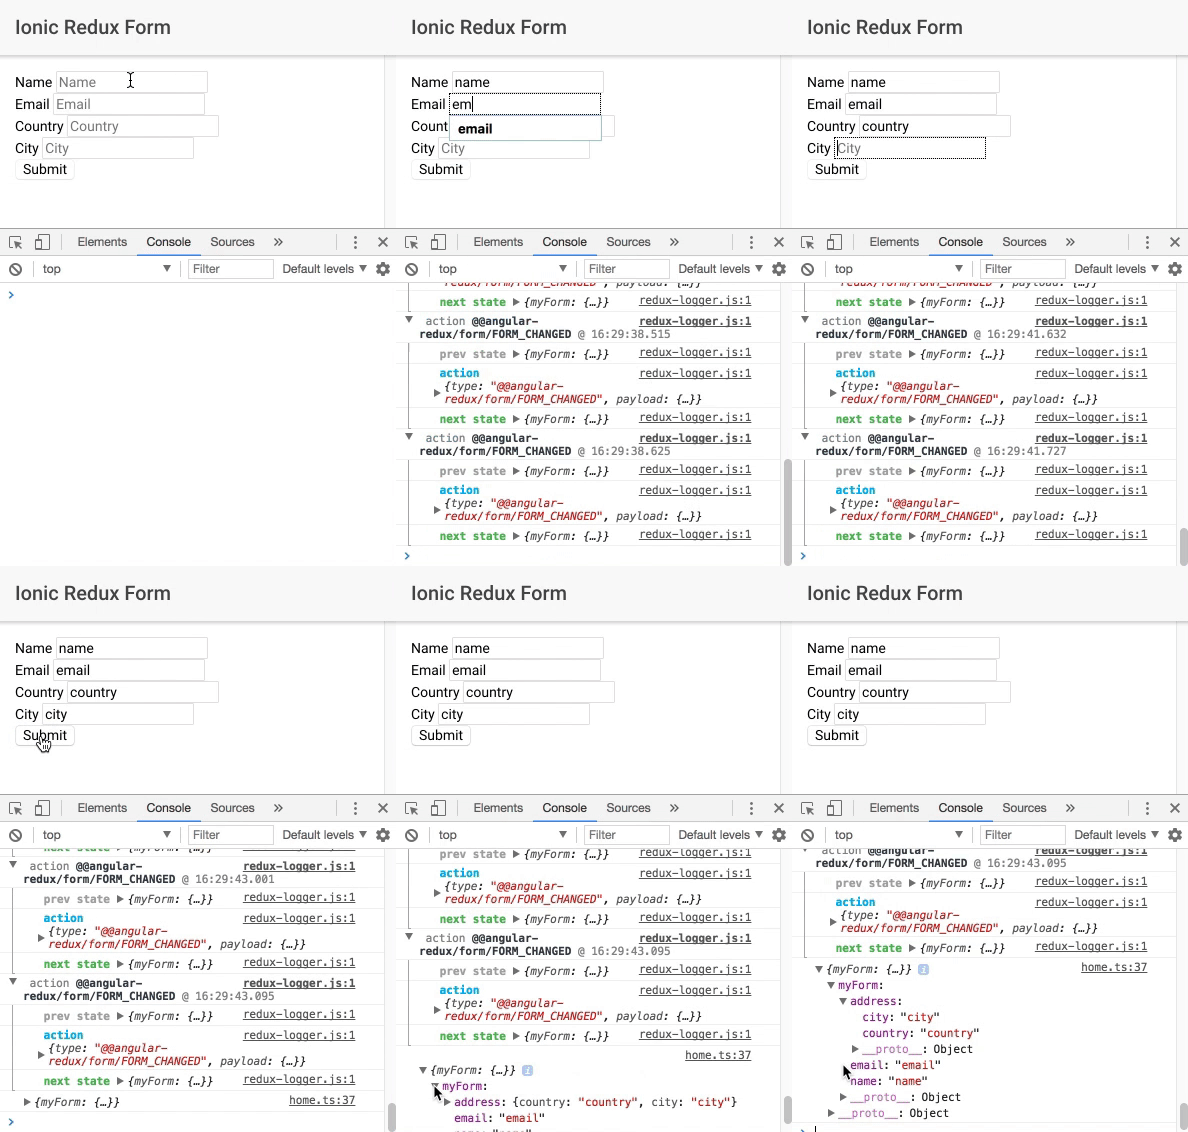
We have our form updating our Redux store:


