Using Redux Reactive Forms With Ionic in One Go
After last week's tutorial on Template-Driven Forms and Redux. Today we attack the Reactive side. We are very lucky because there aren't many changes.
We have already seen what Reactive Forms are, how to use them and how to validate them in Angular.
You should have a look at the Redux introduction and the time travel tutorial if you are not familiar with this new technology.
As usual we install the libraries:
npm i --save redux redux-logger @angular-redux/form @angular-redux/store
We start by importing the Modules in the app.module.ts file:
import { ReactiveFormsModule } from '@angular/forms';

import { NgReduxModule } from '@angular-redux/store';
import { NgReduxFormModule } from '@angular-redux/form';

@NgModule({
  ...
  imports: [
    BrowserModule,
    IonicModule.forRoot(MyApp),
    ReactiveFormsModule,
    NgReduxFormModule,
    NgReduxModule
  ],
  providers: [
    StatusBar,
    SplashScreen,
    {provide: ErrorHandler, useClass: IonicErrorHandler}
  ]
})
export class AppModule {}
- ReactiveFormsModule is Angular's module for creating reactive forms
- NgReduxModule is Redux Core Angular module
- NgReduxFormModule is the extension for the forms feature
The home.html form is very similar to a normal reactive one:
  <form [formGroup]="userForm" connect="myForm" (ngSubmit)="onFormSubmitted()">

    <div>
      <label>
        <span>Name</span>
        <input type="text" placeholder="Name" formControlName="name">

        <p *ngIf="userForm.controls.name.errors">
          This field is bad!
        </p>
      </label>
    </div>

    <div>
      <label>
        <span>Email</span>
        <input type="email" placeholder="Email" formControlName="email">
      </label>
    </div>

    <div formGroupName="address">

      <div>
        <label>
          <span>Country</span>
          <input type="text" placeholder="Country" formControlName="country">
        </label>
      </div>

      <div>
        <label>
          <span>City</span>
          <input type="text" placeholder="City"  formControlName="city">
        </label>
      </div>

    </div>

    <input type="submit" [disabled]="userForm.invalid">

  </form>
The connect Directive will grab the myForm field from the Redux Store. The formGroup Directive will use a userForm property to handle everything related to validations. We will only make one validation by using an ngIf and the userForm.controls.name.errors value.
The rest are some formControl and **formGroup**.
Moving on to the home.ts file with the imports and injections:
import { Component } from '@angular/core';
import { defaultFormReducer} from '@angular-redux/form';
import { NgRedux, DevToolsExtension } from '@angular-redux/store';

import { FormGroup, FormBuilder } from '@angular/forms';

declare var require;

var reduxLogger = require('redux-logger');

@Component({
  selector: 'page-home',
  templateUrl: 'home.html'
})
export class HomePage {
  userForm: FormGroup;

  constructor(public store: NgRedux<any>, public devTools: DevToolsExtension,
              public formBuilder: FormBuilder) {}
}
The defaultFormReducer contains the angular-redux form basic reducer. It handles the FORM_CHANGED action and updates the Redux Store for us.
As usual, the store and devTools Providers are injected. FormGroup and FormBuilder will help us build our reactive form:
  constructor(public store: NgRedux<any>, public devTools: DevToolsExtension,
              public formBuilder: FormBuilder) {

    this.userForm = formBuilder.group({
      name: '',
      email: '',
      address: formBuilder.group({
        country: '',
        city: '',
      })
    });
    ...
  }
The form's structure is similar to the myForm field in the Store's INITIAL_STATE:
const INITIAL_STATE = {
  myForm: {
    name: "",
    email: "",
    address: {
      country: "",
      city: ""
    }
  }
};
The angular-redux form's connect Directive will look for the myForm field then go through each sub-fields to map them to the formControls and the address FormGroup.
The store is finally configured:
    this.store.configureStore(
      defaultFormReducer(),
      INITIAL_STATE,
      [reduxLogger.createLogger()],
      devTools.isEnabled() ? [devTools.enhancer()] : []);
  }
Let's not forget to add the validation on the name field:
  ngOnInit() {
    const nameControl = this.userForm.controls["name"];

    nameControl.valueChanges.subscribe(value => {
      if (value.trim() === '') {
        nameControl.setErrors({
          required: true
        });
      }
    });
  }
This will force the user to fill the name field.
The onFormSubmitted method:
  onFormSubmitted() {
    console.log(this.store.getState());
    // Do the work here
  }
And voila!
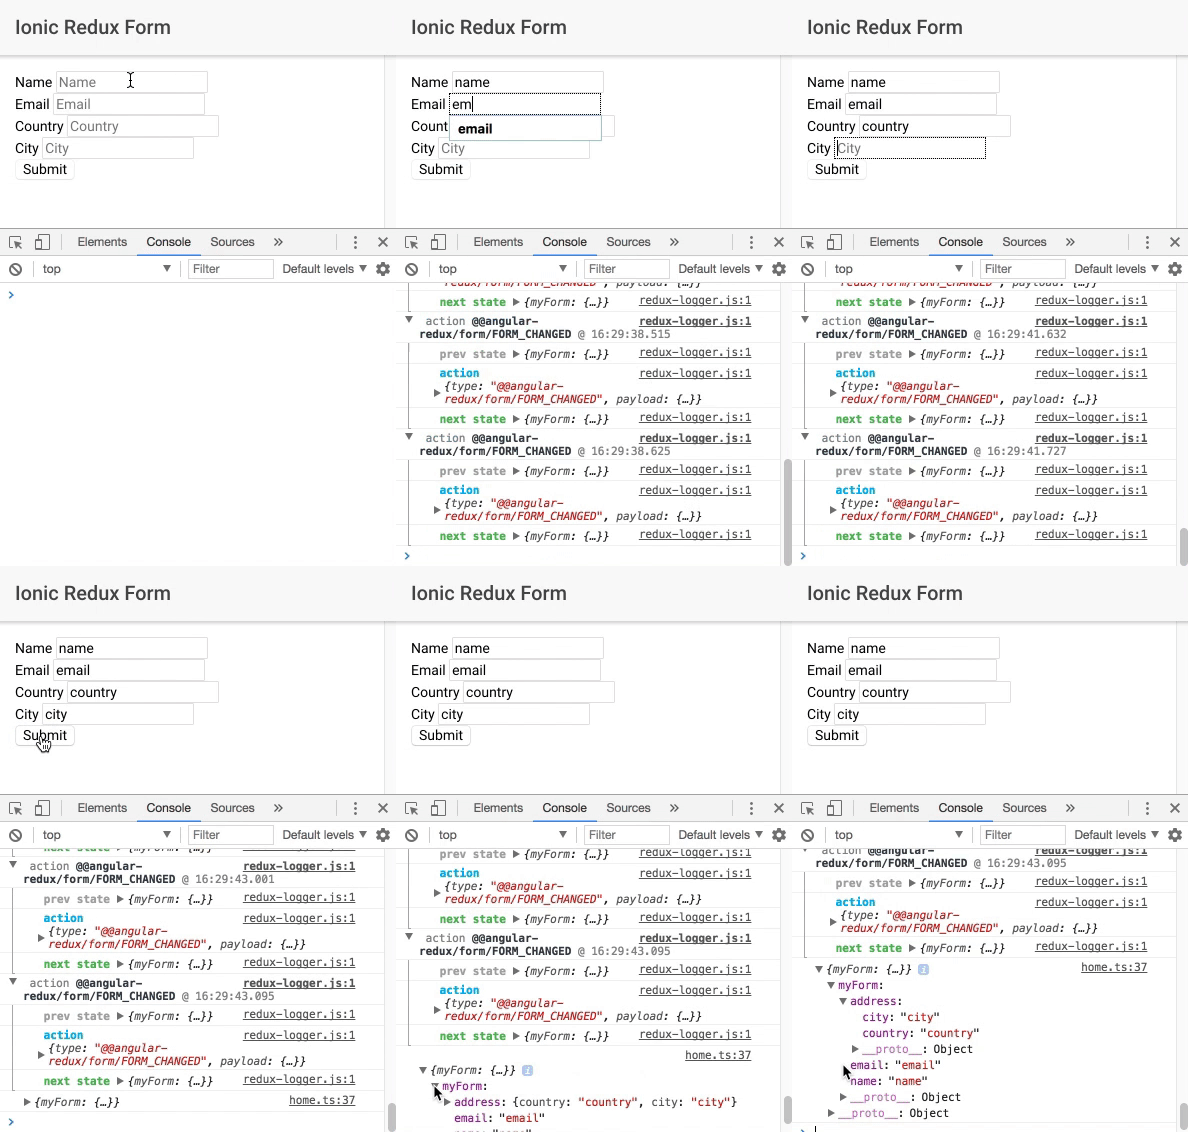
We have our form updating our Redux store:


