Mixing Ionic, Dialogflow and Node.js in One Go
Last week we created an AI Chatbot by using Dialogflow (also known as API.AI) in an Ionic application. It was a fun tutorial and we have seen why people are afraid AIs will take their jobs.
However, it wasn't complete. The users could talk to an AI and receive some predefined information, but all of those weren't real information.
In this tutorial, we will link our Dialogflow service to a Node.js server in order to allow real world actions (don't forget to go through the first tutorial).
We will need two Node.js libraries:
npm i --save express body-parser
Express is the server and body-parser will allow us to receive information from Dialogflow.
var express = require("express");
var bodyParser = require("body-parser");

var app = express();

app.use(bodyParser.urlencoded({ extended: false }));

app.use(bodyParser.json());

app.listen(3000, function() {
  console.log("Example app listening on port 3000!");
});
The initialization is quite basic.
We tell our server to use bodyParser and we start listening on the port 3000.
Dialogflow will send a POST request on the "visa" path:
app.post("/visa", function(req, res) {
  var params = req.body.result.parameters;
  res.setHeader("Content-Type", "application/json");

  var deliveryTime = calculateDeliveryTime();

  response = `Your Visa for ${
    params.geoCountry
  } will be ready in ${deliveryTime}`;
  res.send(JSON.stringify({ speech: response, displayText: response }));
});
Last week we created the following parameters:
- geoCountry
- enteringCity
- leavingCity
- givenName
- lastName
Those parameters will be located in the req.body.result.parameters field.
The Content-Type of the response is set to "application/json" so Dialogflow can understand it.
Now we can start the real work by triggering a calculateDeliveryTime method.
This is where the business code is located, here is a simple example:
function calculateDeliveryTime() {
  // Make call to database, etc.
  return "one week";
}
Finally the response is created and sent back to Dialogflow:
response = `Your Visa for ${
  params.geoCountry
} will be ready in ${deliveryTime}`;

res.send({ speech: response, displayText: response });
Dialogflow will forward this response to the Ionic application. If we don't follow the same data structure, our response won't be forwarded.
We can finally send the response as an object containing the speech and displayText fields!
Pushing the Node.js server to the cloud can take some time. There are many services like Heroku, AWS, Firebase, but let's just make it simpler and faster by using ngrock.
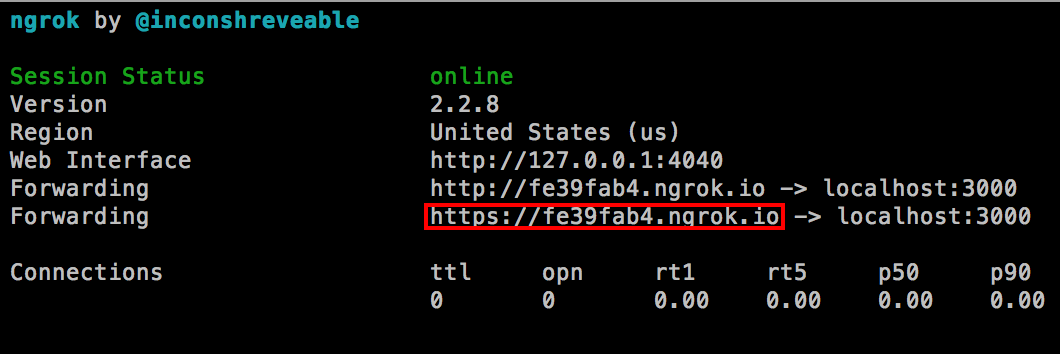
Once the install is done, a simple click will launch the application showing the documentation in the terminal:

We can now use it like this:
/Users/matthieu/Downloads/ngrok 3000
The https url is ready:

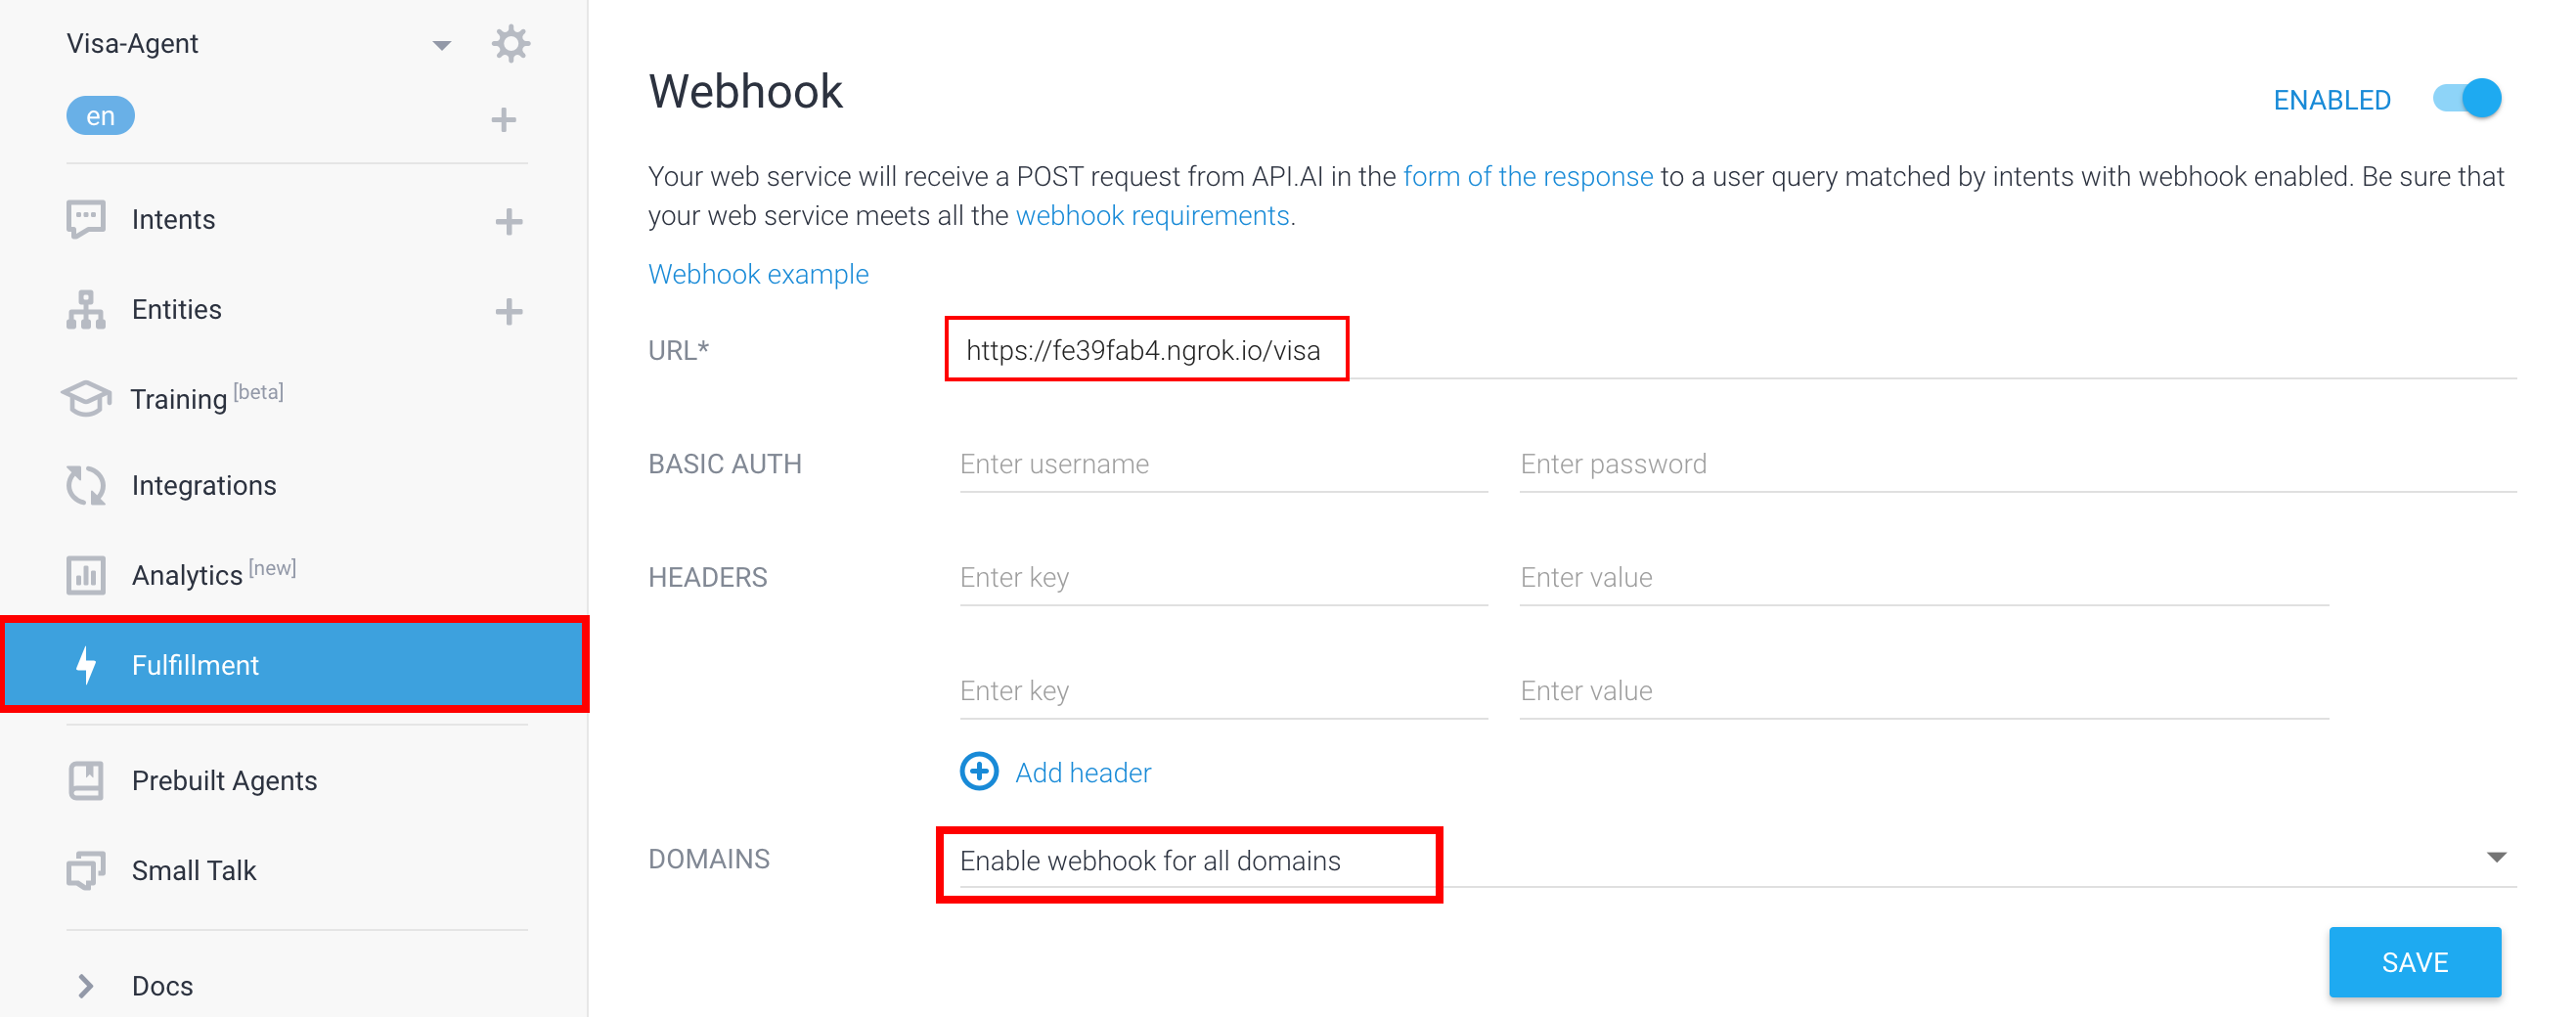
And we go back to Dialogflow, more precisely, to the fulfillment section:

This area allows us to force Dialogflow to pass a request to our Node.js server and wait for its response. They call it fulfillment, I guess that's because the mechanism is similar to a Promise ...
Anyway, we enable it and had the url of our REST API (server address + 'visa' path) then we enable this fulfillment on every domains.
We have one last checkbox to check:

The "Use webhook" option will only delegate the answer mechanism to the Node.js server. We can also use the "Use webhook for slot-filling" option to delegate the questions when a parameter is missing.
We can finally go to the Ionic application and see the final result:

As I stated at the beginning, take a look at the previous tutorial otherwise you won't understand how we got here 😃.


