Integrating a Labeled Marker in an Augmented Reality Ionic App using Wikitude
The first time I developed an Augmented Reality application I used an (ugly) black and white Marker. This method was very cool and I was totally bluffed by the technology.
However, this wasn't very scalable. Can you imagine how annoying it would be to go around and paint markers everywhere?
Nowadays these markers can be integrated by using geolocations, locations of walls and points of intersection!
Some changes
Markers are still used, however, not in this shape:

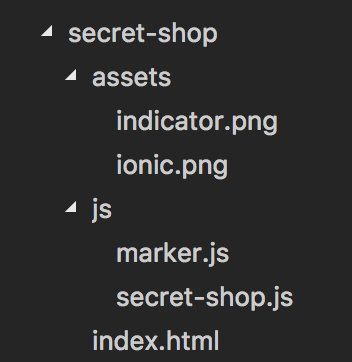
Here is our new experience folder's organization:

Two images will be used, one will be the 2D representation of our Marker in the real world and the other one will just be an indicator.
Using the index.html file from the previous tutorial, we add two scripts:
<body>
  <script src="js/marker.js"></script>
  <script src="js/secret-shop.js"></script>
</body>
The secret-shop.js file contains our World and the marker.js file contains a Class that will return a specific Marker.
Moving back to the home.ts file:
this.arExperienceUrl = "www/assets/experience/world/secret-shop/index.html";
We set our new experiment.
Our new world
Here is the first part of our World in the secret-shop.js file:
var World = {
  initiallyLoadedData: false,
  markerDrawableIdle: null,
  markerDrawableDirectionIndicator: null,

  locationChanged: function locationChangedFn(lat, lon, alt) {
    if (!World.initiallyLoadedData) {
      var poiData = {
        id: 1,
        longitude: lon + (Math.random() / 5 - 0.1),
        latitude: lat + (Math.random() / 5 - 0.1),
        altitude: alt,
        description: "The secret Ionic shop is here",
        title: "Ionic meeting"
      };

      World.loadPois(poiData);
      World.initiallyLoadedData = true;
    }
  }
};
For now, we only have three properties.
The initiallyLoadedData flag that will change once the World is loaded.
markerDrawableIdle and markerDrawableDirectionIndicator which will contain some ImageResources.
The locationChanged method will be triggered once the location has changed and give us the new latitude, longitude and altitude.
The code inside will run if the World hasn't been initialized yet. It will create new data for a Point Of Interest (POI) that is close to the current user.
A Point Of Interest is simply a valuable location, if you are lost in a desert, the closest POI would be the closest Oasis or the closest City.
Once everything is ready, this data will be used to load the POI by calling the loadPois method.
Which is as follow:
loadPois: function loadPoisFn(poiData) {
  World.markerDrawableIdle = new AR.ImageResource("assets/ionic.png");
  World.markerDrawableDirectionIndicator = new AR.ImageResource(
    "assets/indicator.png"
  );

  var marker = new Marker(poiData);
}
Just setting the ImageResources then initializing a new Marker passing the poiData variable.
Finally, the locationChanged method is attached to the AR.context.onLocationChanged callback:
AR.context.onLocationChanged = World.locationChanged;
The Marker
Moving on to our final file, the marker.js:
class Marker {
  constructor(poiData) {
    this.poiData = poiData;

    var markerLocation = new AR.GeoLocation(
      poiData.latitude,
      poiData.longitude,
      poiData.altitude
    );
  }
}
Starting by declaring a Class that receives the poiData from the World and creates a new Geolocation.
Still inside this constructor:
this.titleLabel = new AR.Label(poiData.title, 1, {
  zOrder: 1,
  translate: {
    y: 0.55
  },
  style: {
    textColor: "#ff0000",
    fontStyle: AR.CONST.FONT_STYLE.BOLD
  }
});

this.descriptionLabel = new AR.Label(poiData.description, 0.8, {
  zOrder: 1,
  translate: {
    y: -0.55
  },
  style: {
    textColor: "#FFFFFF",
    fontStyle: AR.CONST.FONT_STYLE.BOLD
  }
});
Two Labels are created, one for the title and another one for the description.
The first parameter is the content, followed by the height and some styles similar to the CSS language.
Note the zOrder parameter, it acts like the z-index property so both labels are on the same layer, one above (translate : { y: 0.55}) and one below (translate : { y: -0.55}).
Just like in the previous tutorial, we add an indicator:
this.directionIndicatorDrawable = new AR.ImageDrawable(
  World.markerDrawableDirectionIndicator,
  0.1,
  {
    verticalAnchor: AR.CONST.VERTICAL_ANCHOR.TOP
  }
);
And set everything together:
this.markerObject = new AR.GeoObject(markerLocation, {
  drawables: {
    cam: [this.markerDrawableIdle, this.titleLabel, this.descriptionLabel],
    indicator: this.directionIndicatorDrawable
  }
});
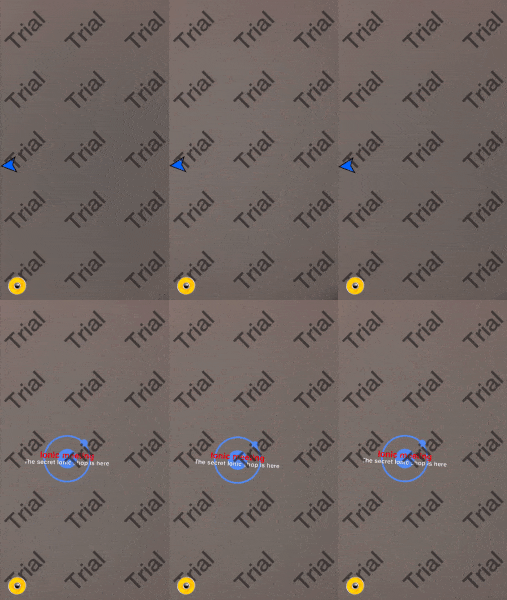
Our Marker is now created with its indicator:

Conclusion
Markers have evolved, however there is still some room for improvement.
If the user has a bad GPS it will totally mess up the application by placing the markers at the wrong places: you don't want to have your McDonald's icon in front of the Burger King.
Creating a Marker is very simple and dynamic, at the end of the day, it's just a Class that can receive different information.
Typically a Factory can deliver different types of Markers and make mobile Augmented Reality application development a piece of cake.


