Creating an Ionic AI Chatbot with Dialogflow (or API.AI)
Artificial Intelligence (AI) is everywhere. I can't spend one day without hearing about one new AI feature, they are even featured in my video games!
No wonder Elon Musk is accelerating his Mars colonization project.

Artificial Intelligence can be quite complicated, but new platforms are created to simplify it.
The Dialogflow Company created a simple conversational platform. By using this type of tools many tasks can be automated and we can reduce the employees charge (even eliminate it in the best case).
In this tutorial, we are going to use this AI platform to create an Ionic application that can (almost) replace an entire call center.
Note before starting, Dialogflow is the new name for API.AI so you might see some screenshots referencing the old name.
A simple Dialogflow example
It all starts at the Dialogflow website where an account can be created. As you can see, the interface is quite familiar and that's because Google bought it. As usual when something is great, Google buys it.
Once the account is created, we can go to the console.
Before diving in this service, let's have a look at how Artificial Intelligence works.
One good example is comparing it to humans.
Can you multiple 9 by 9?
You can either go from 9 * 10 = 90 then subtract 9 to get 81, or use the famous trick:

We, human beings, have a tendency to look at how things work and generally extrapolate an algorithm to alleviate the charge on our memory.
AIs are quite similar. They also have algorithms, Dialogflow uses Machine Learning (ML) algorithms to understand what a user is trying to say (Intent). Those algorithms are evolving very fast. AIs can be compared to dogs and we are the dog trainers telling them to sit 200 times a day then giving them rewards when they do it successfully. However, those training sessions are extremely fast. It can take a week to tame and teach tricks to a dog, for an AI this can be done in hours.
All of that depends on how much training data we have (this can be unlimited if we have a company like Facebook or Google) and the processing power (that can easily be acquired thanks to Cloud Computing).
As you can see, it's the perfect time to invest in this technology.
Let's go back to the Dialogflow service.
The first thing we see is the Hotel Booking Agent.
An agent will respond to our demands. This one was built to help us understand how to use the Dialogflow service.
We are going to create our own agents:
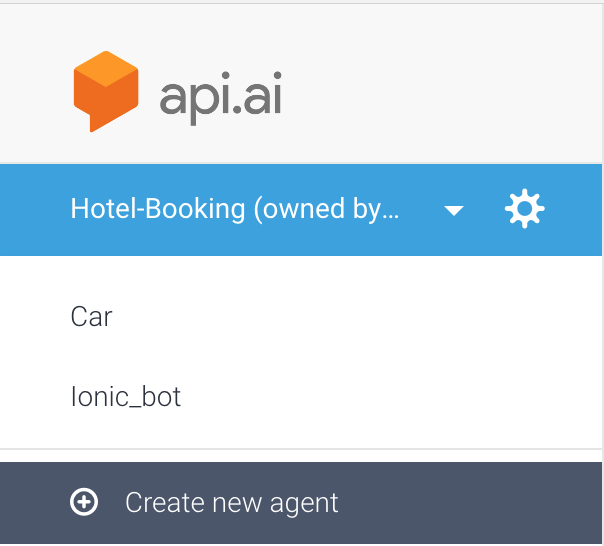
The first one will be very simple. Our aim is to create an AI agent that can say "Hello" and "Goodbye" then use it in the Ionic application.
The creation is very basic:
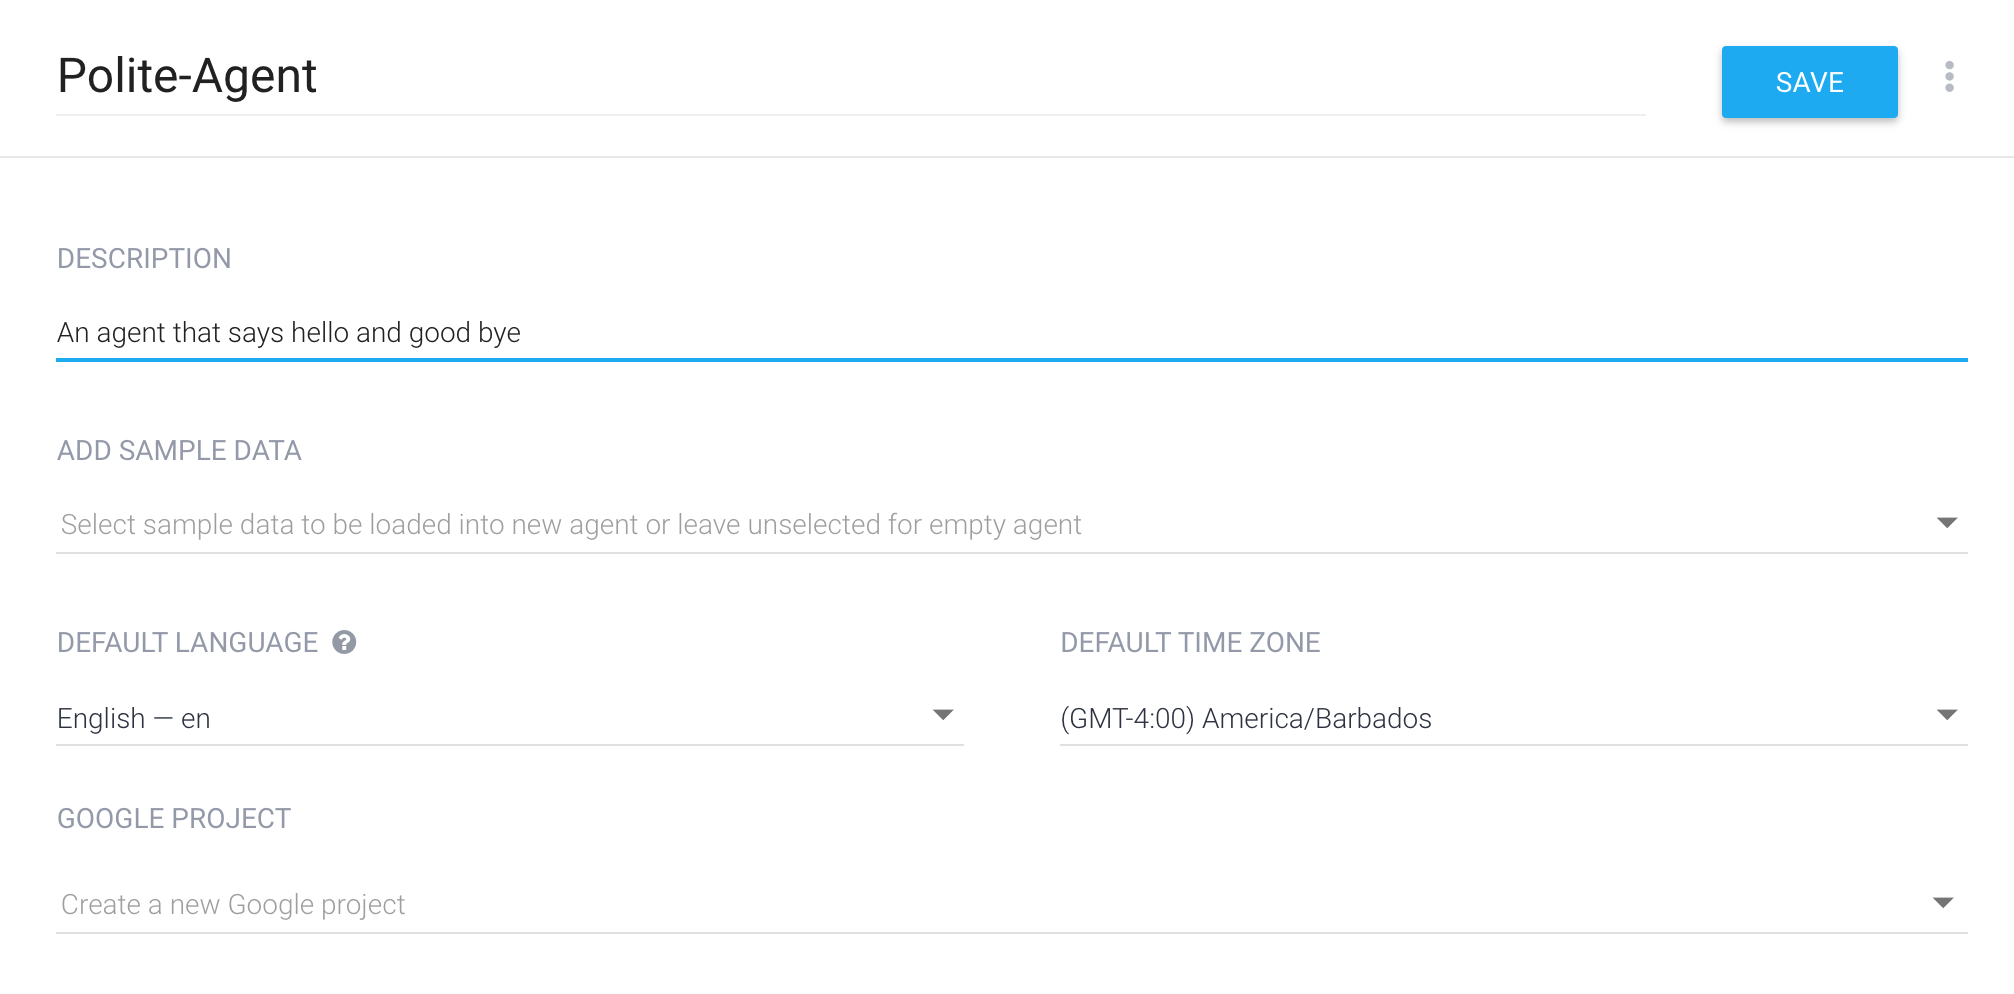
Our AI agent will need some intents that will help us understand what the user wants to say and how it should answer back.
We create the "Welcome" intent first:

And populate it:
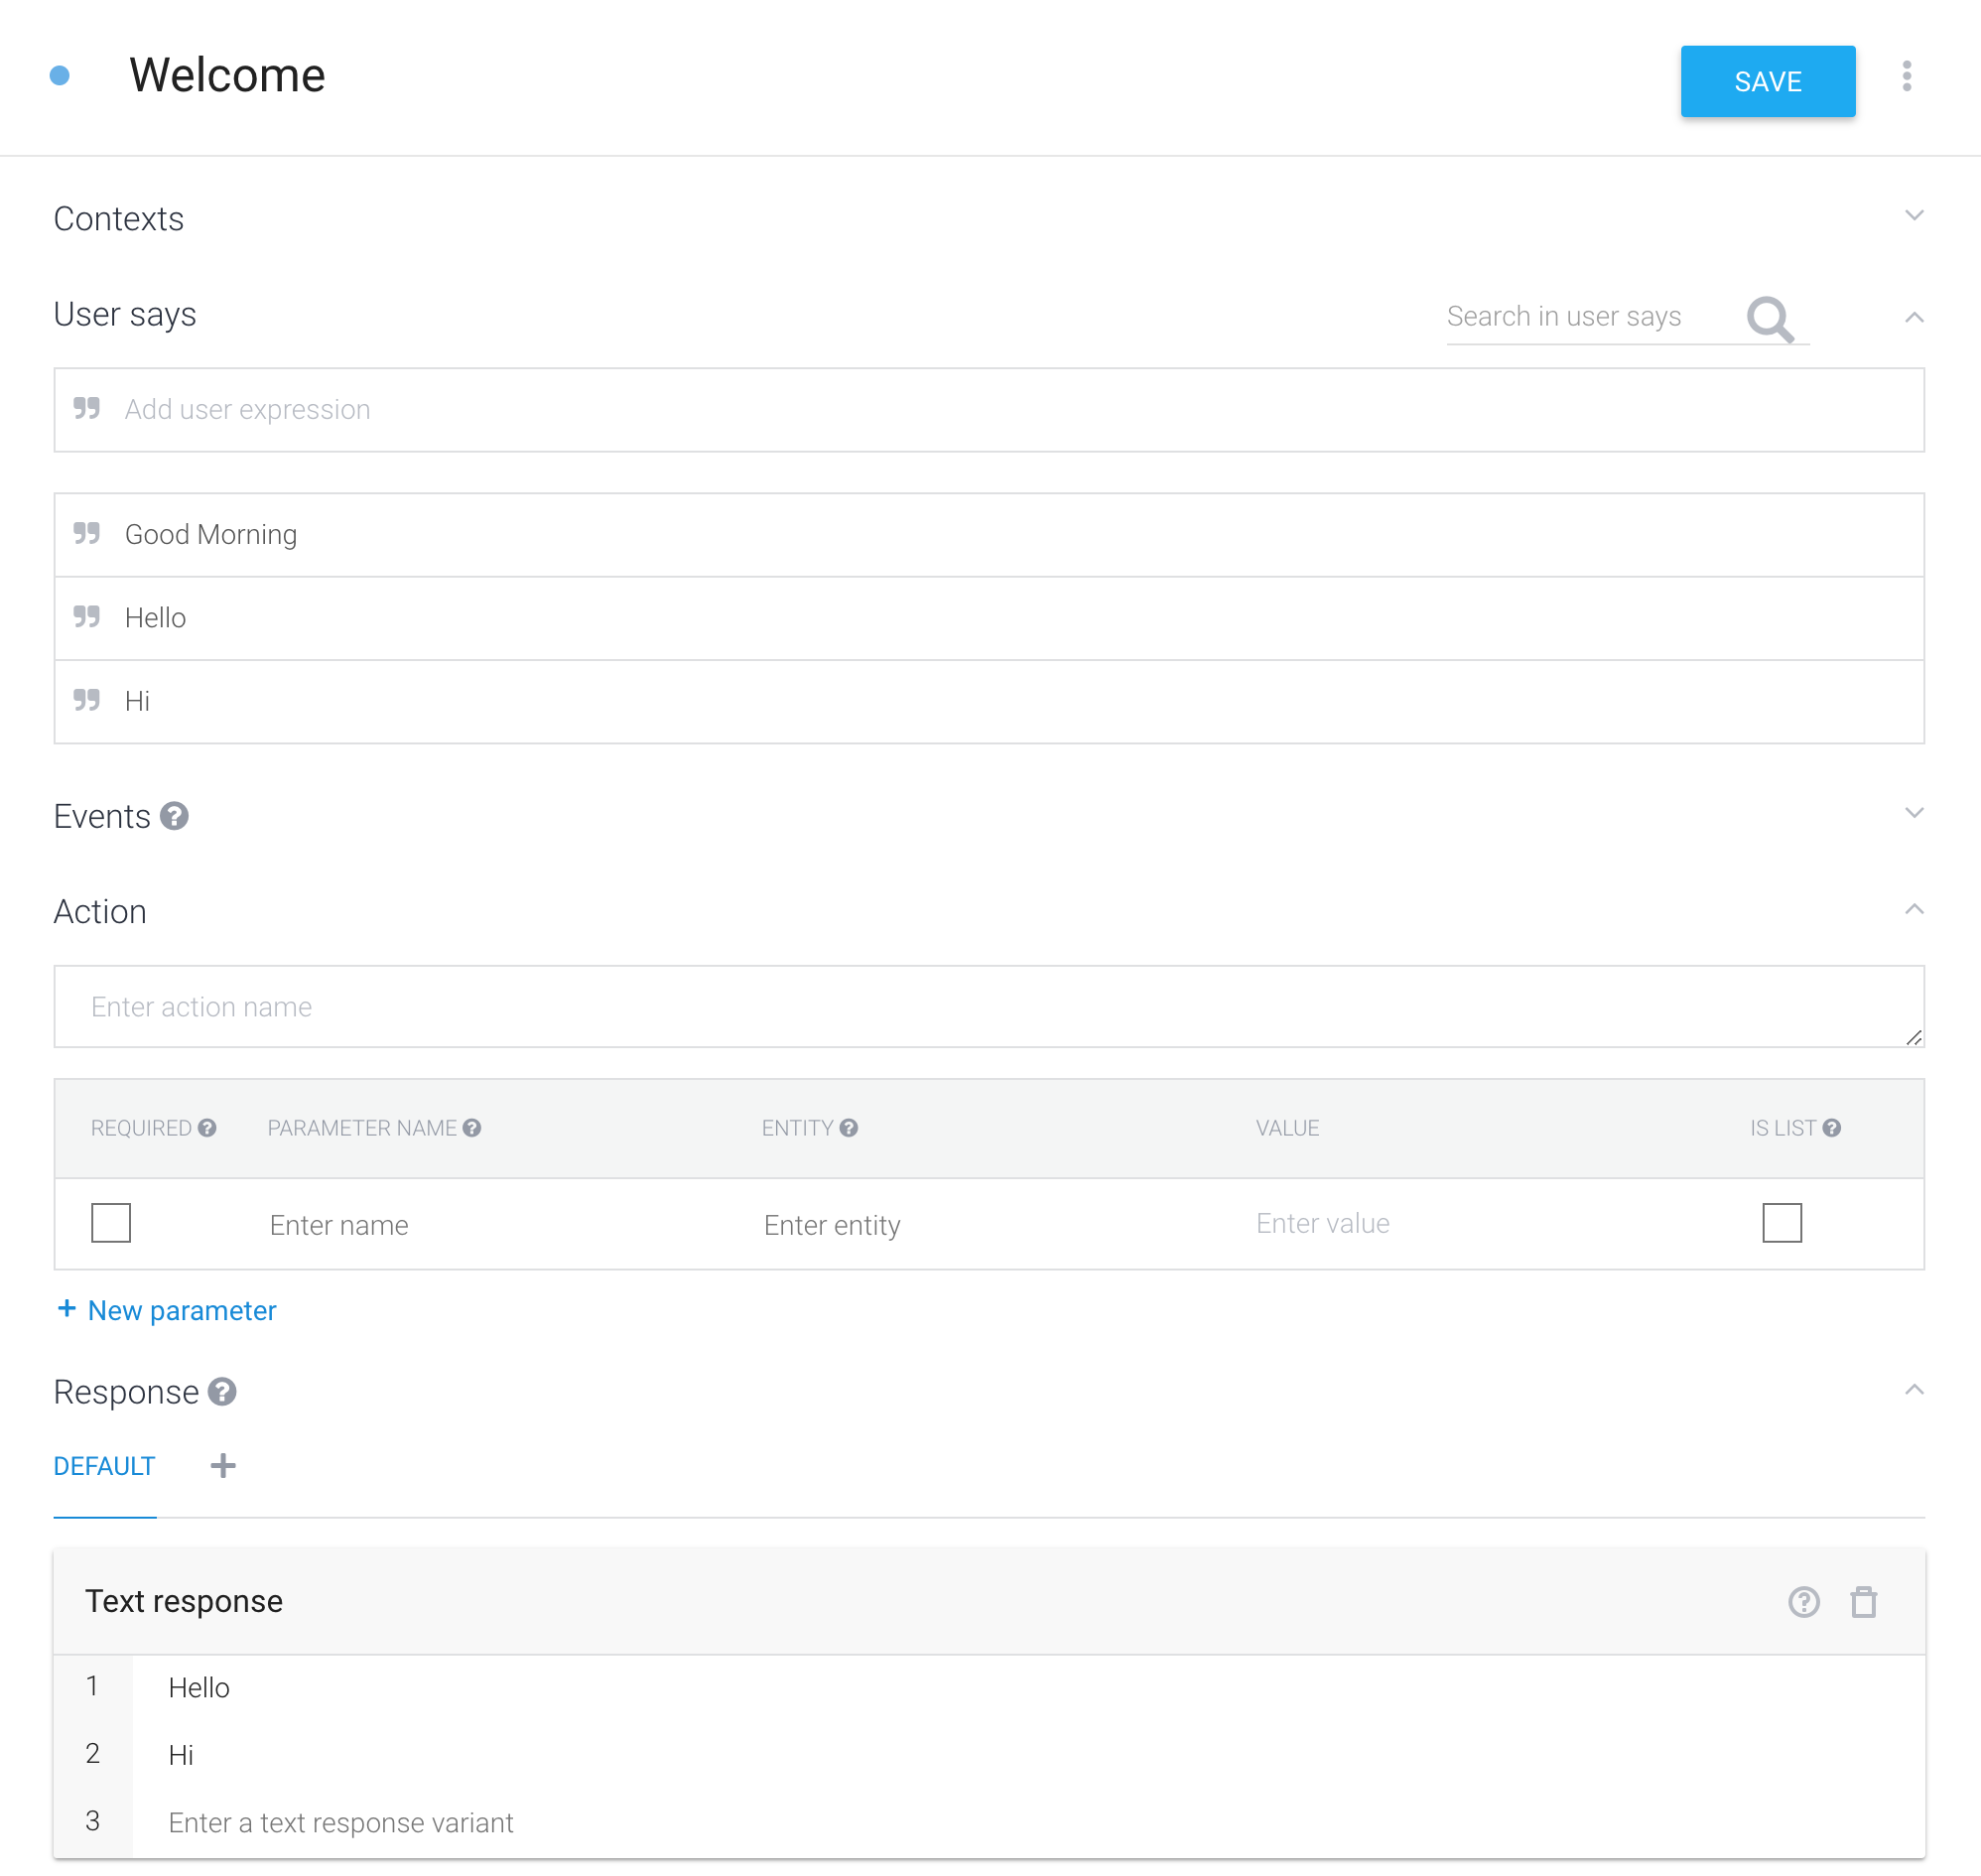
When the user will say one of the following sentences:
- Good Morning
- Hello
- Hi
The AI agent will answer with one of the following sentences:
- Hello
- Hi
Intents must be separated, we can't create one big intent and put everything inside.
We do the same for the "Goodbye" intent:

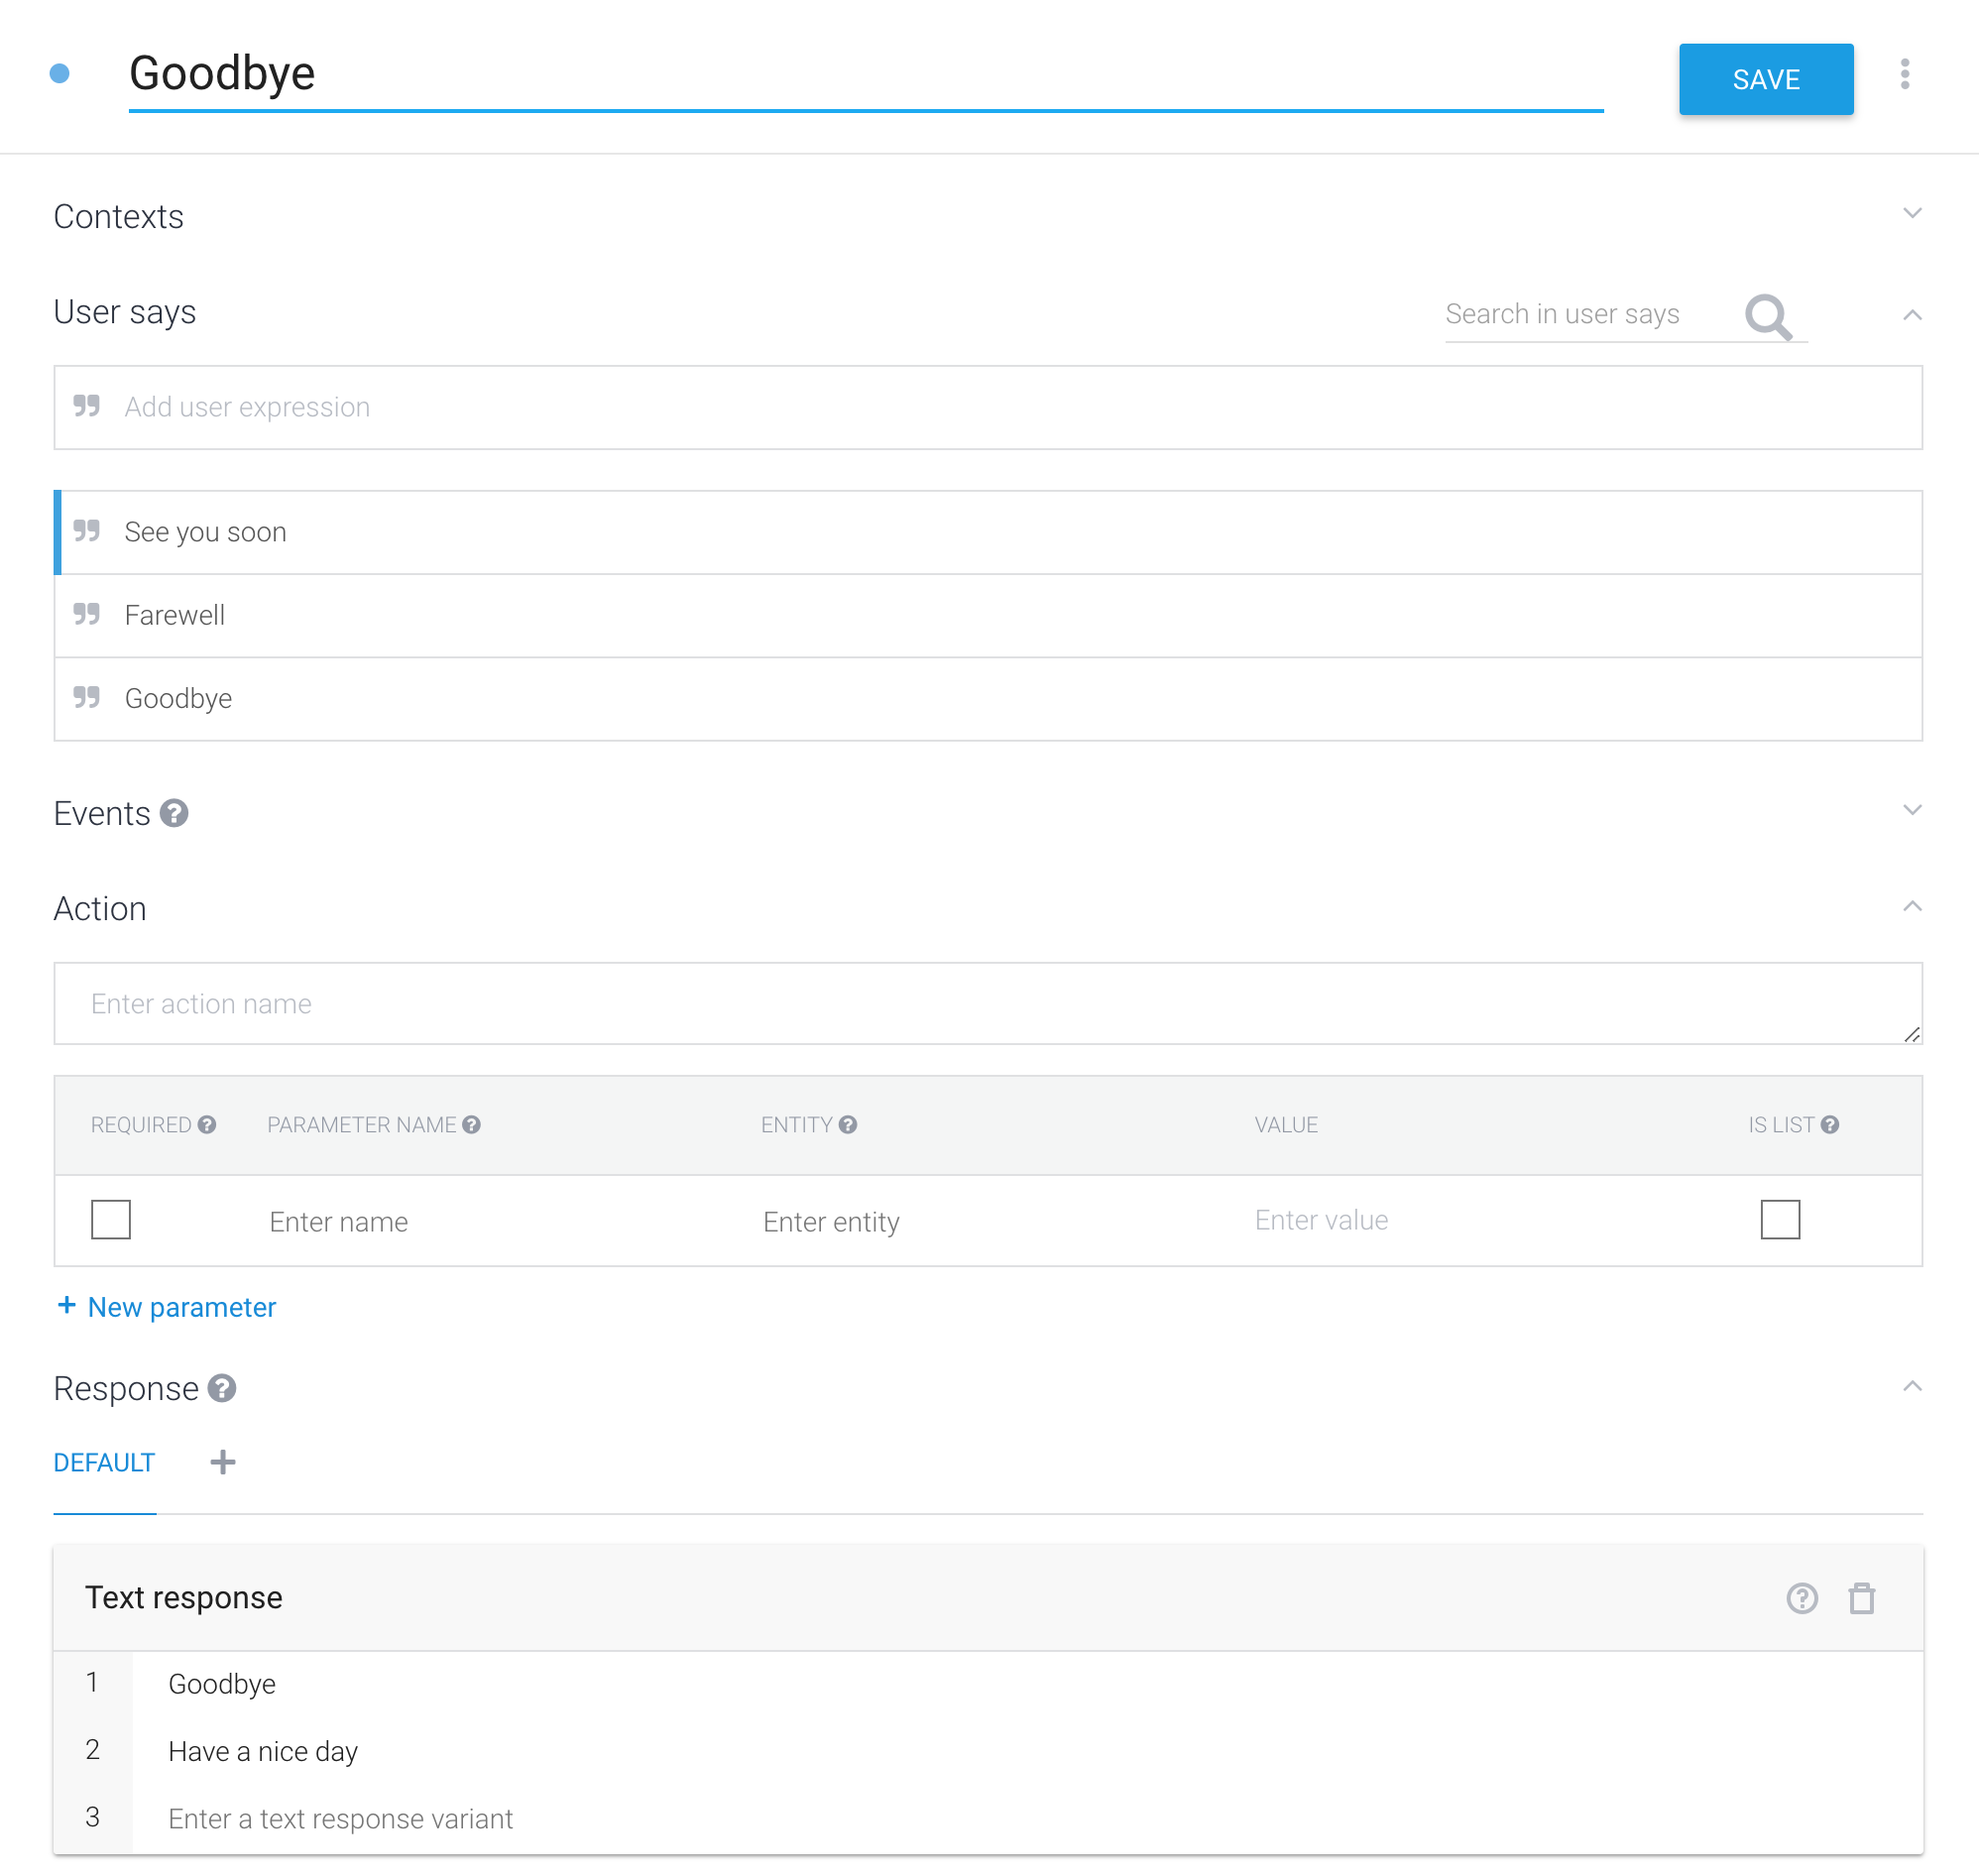
We can now directly test how the AI agent answers to the user by using the conversation area on the right:

The agent is responding accordingly.
We can even push it further:
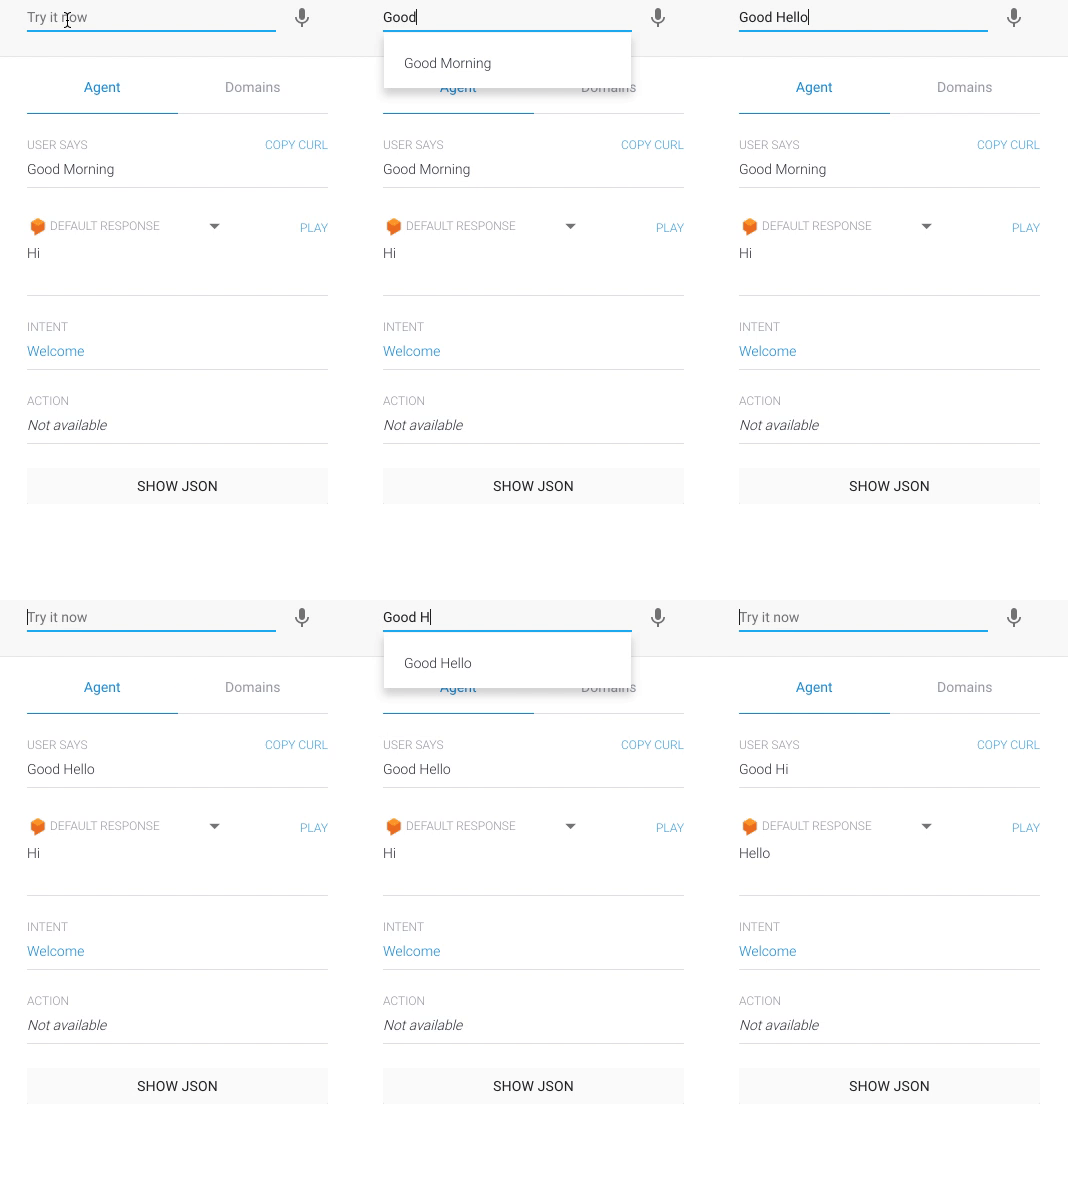
Even if the words don't completely match what we entered before, the Machine Learning (ML) algorithm understands what the user is trying to say.
We can now connect Dialogflow to Ionic.
The Ionic Application
Let's start a new Ionic project:
ionic start ionic-apiai blank
And install the Dialogflow Cordova plugin:
ionic cordova plugin add cordova-plugin-apiai
Note that since we are using the Cordova plugin, this is only working on a simulator or a real device.
The home.html is quite simple:
<ion-header>
  <ion-navbar>
    <ion-title>
      Ionic API.AI Chatbot
    </ion-title>
  </ion-navbar>
</ion-header>

<ion-content padding>

  <input ion-text type="text" [(ngModel)]="question">

  <button ion-button (click)="ask(question)">
    Ask
  </button>

  <div>
    {{answer}}
  </div>

</ion-content>
We have:
- An input to type a question
- A binding showing the answer property
- A button that will trigger the ask method by passing the question value
The home.ts file is a bit more challenging.
Let’s start with the imports and injections:
import { Component, NgZone } from '@angular/core';

import { Platform } from 'ionic-angular';

declare var ApiAIPromises: any;

@Component({
  selector: 'page-home',
  templateUrl: 'home.html'
})
export class HomePage {
  answer;

  constructor(public platform: Platform, public ngZone: NgZone) {
    platform.ready().then(() => {
      ...

    });
  }
}
The ApiAIPromises is available thanks to the Dialogflow Cordova plugin. However, we need to declare it so TypeScript give us some leeway later on.
APIAIPlugin is also available if you prefer to work with callbacks.
The first important import is NgZone, Angular doesn’t care about what is happening with Cordova. We will use NgZone to notify Angular that a property has changed and the template needs an update.
The whole code will run once the device is ready thanks to the Platform Service.
platform.ready().then(() => {
  ApiAIPromises.init({
    clientAccessToken: "26950d7a838f45e0b584e39ef33c7c47"
  }).then(result => console.log(result));
});
The ApiAIPromises init method will connect our Ionic application to the Dialogflow project, it only needs a client access token which is available there:
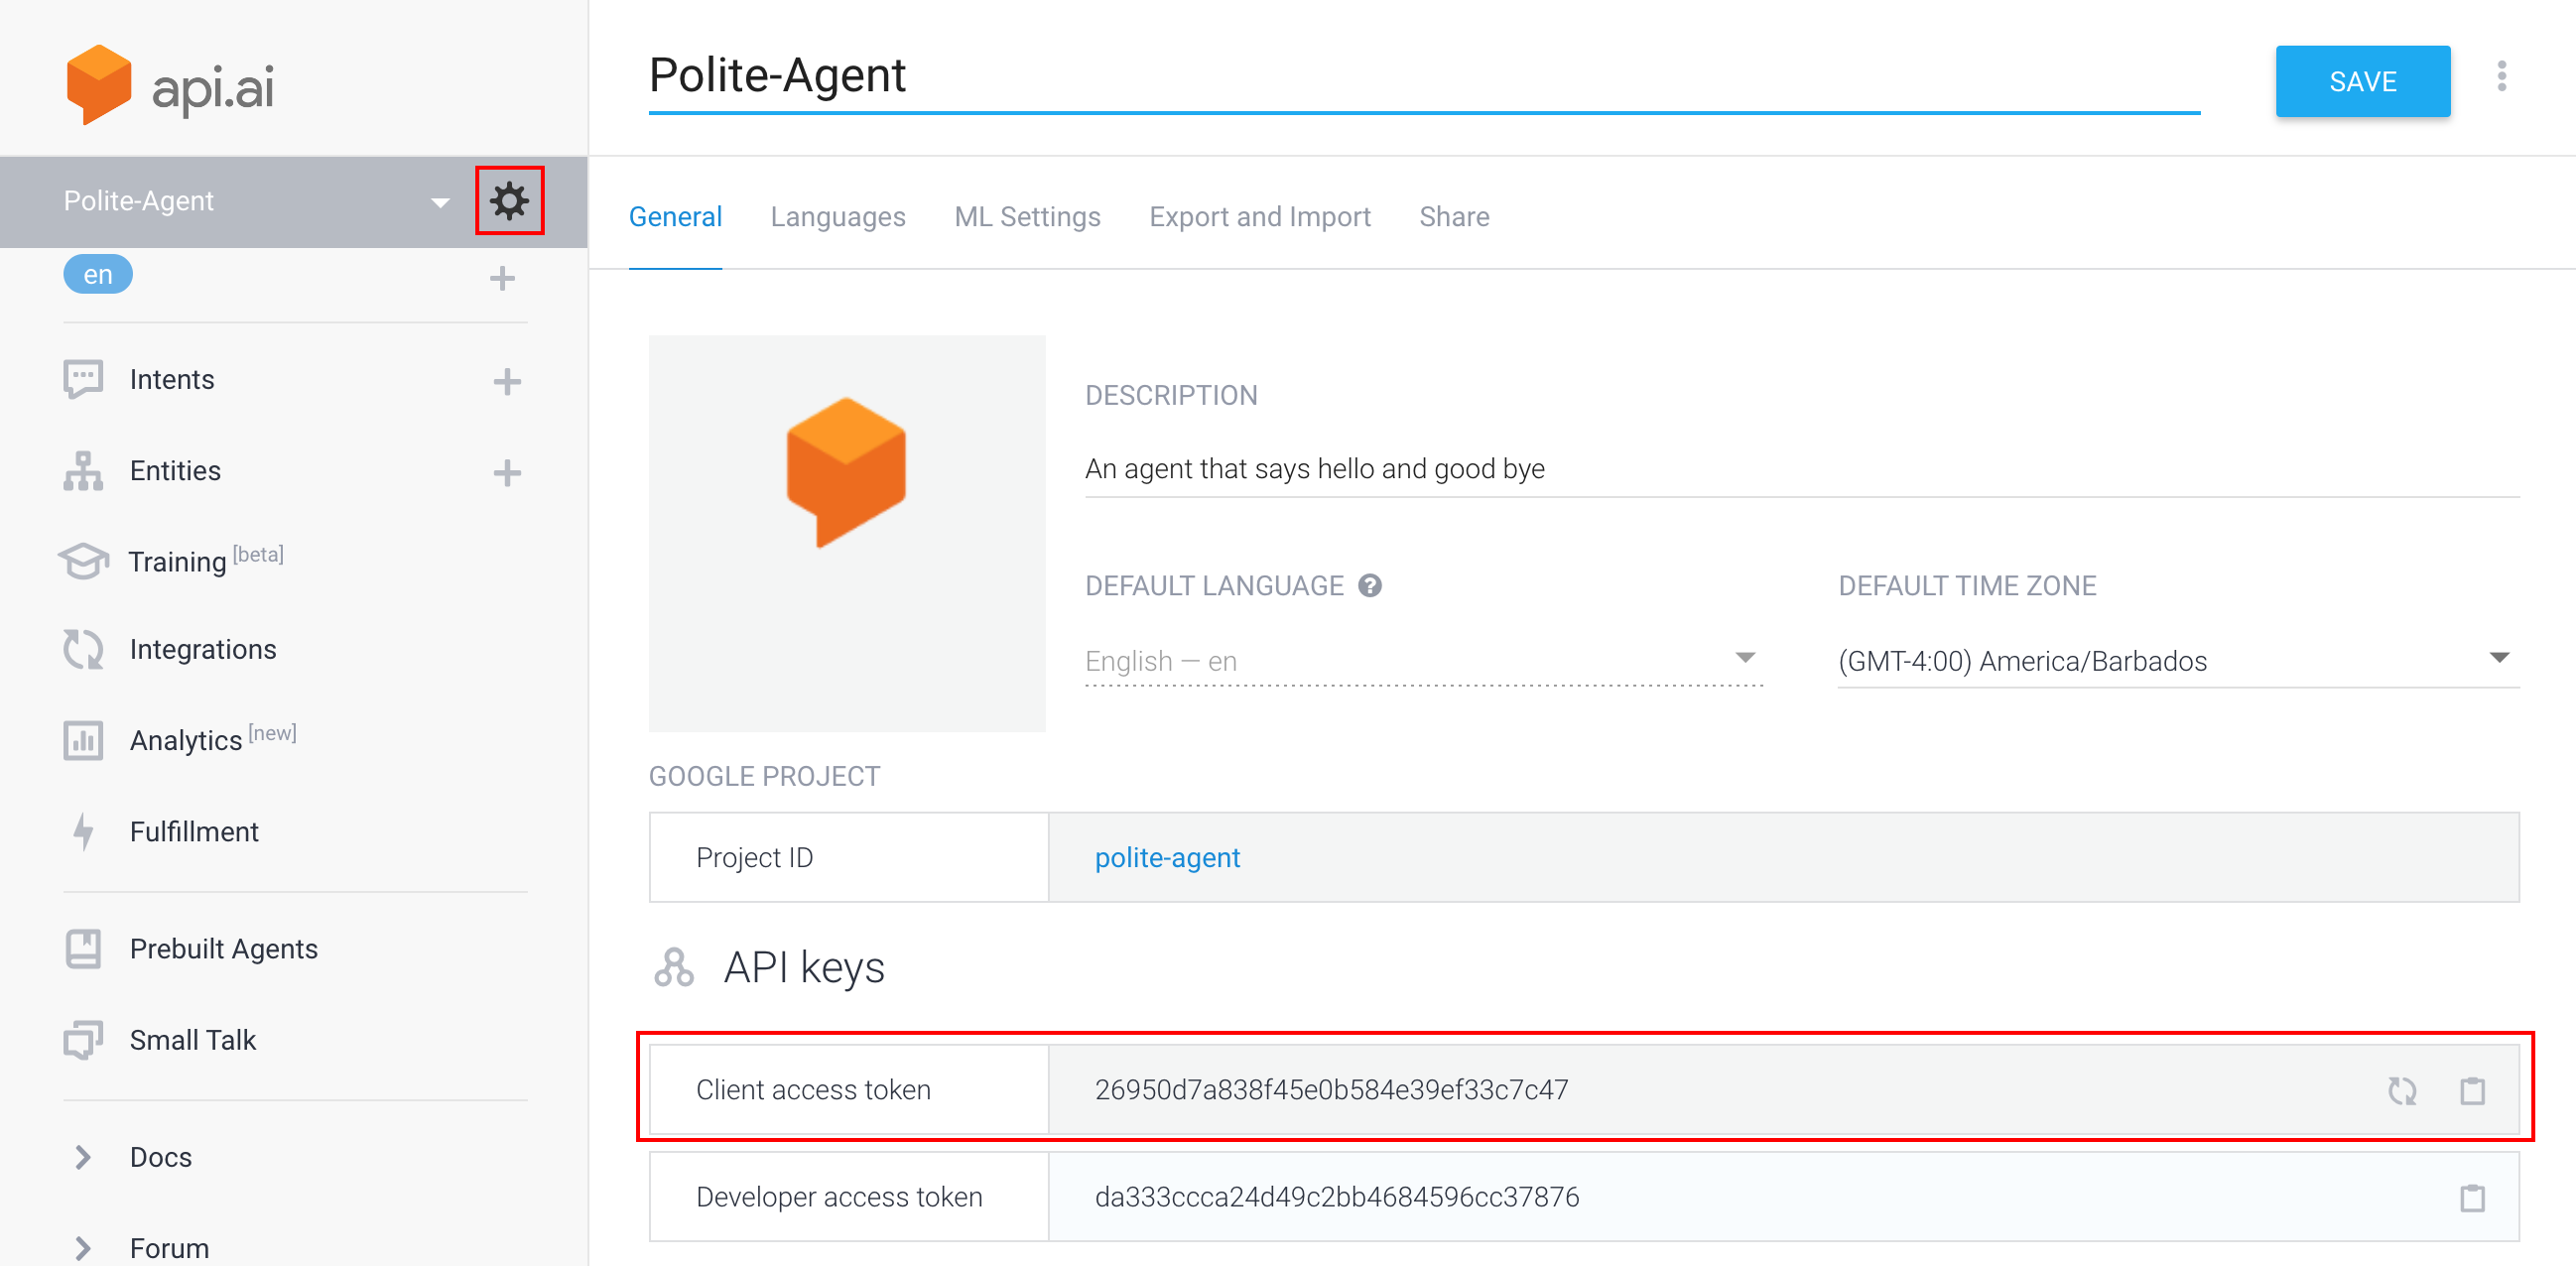
The final step, the ask method:
  ask(question) {
    ApiAIPromises.requestText({
      query: question
    })
    .then(({result: {fulfillment: {speech}}}) => {
       this.ngZone.run(()=> {
         this.answer = speech;
       });
    })
  }
The ApiAIPromises requestText method will pass our query to the Dialogflow server.
The answer property will finally be updated by using the content of the speech field and ngZone will tell Angular to update the template.
We can now talk to our Dialogflow bot in our Ionic application!
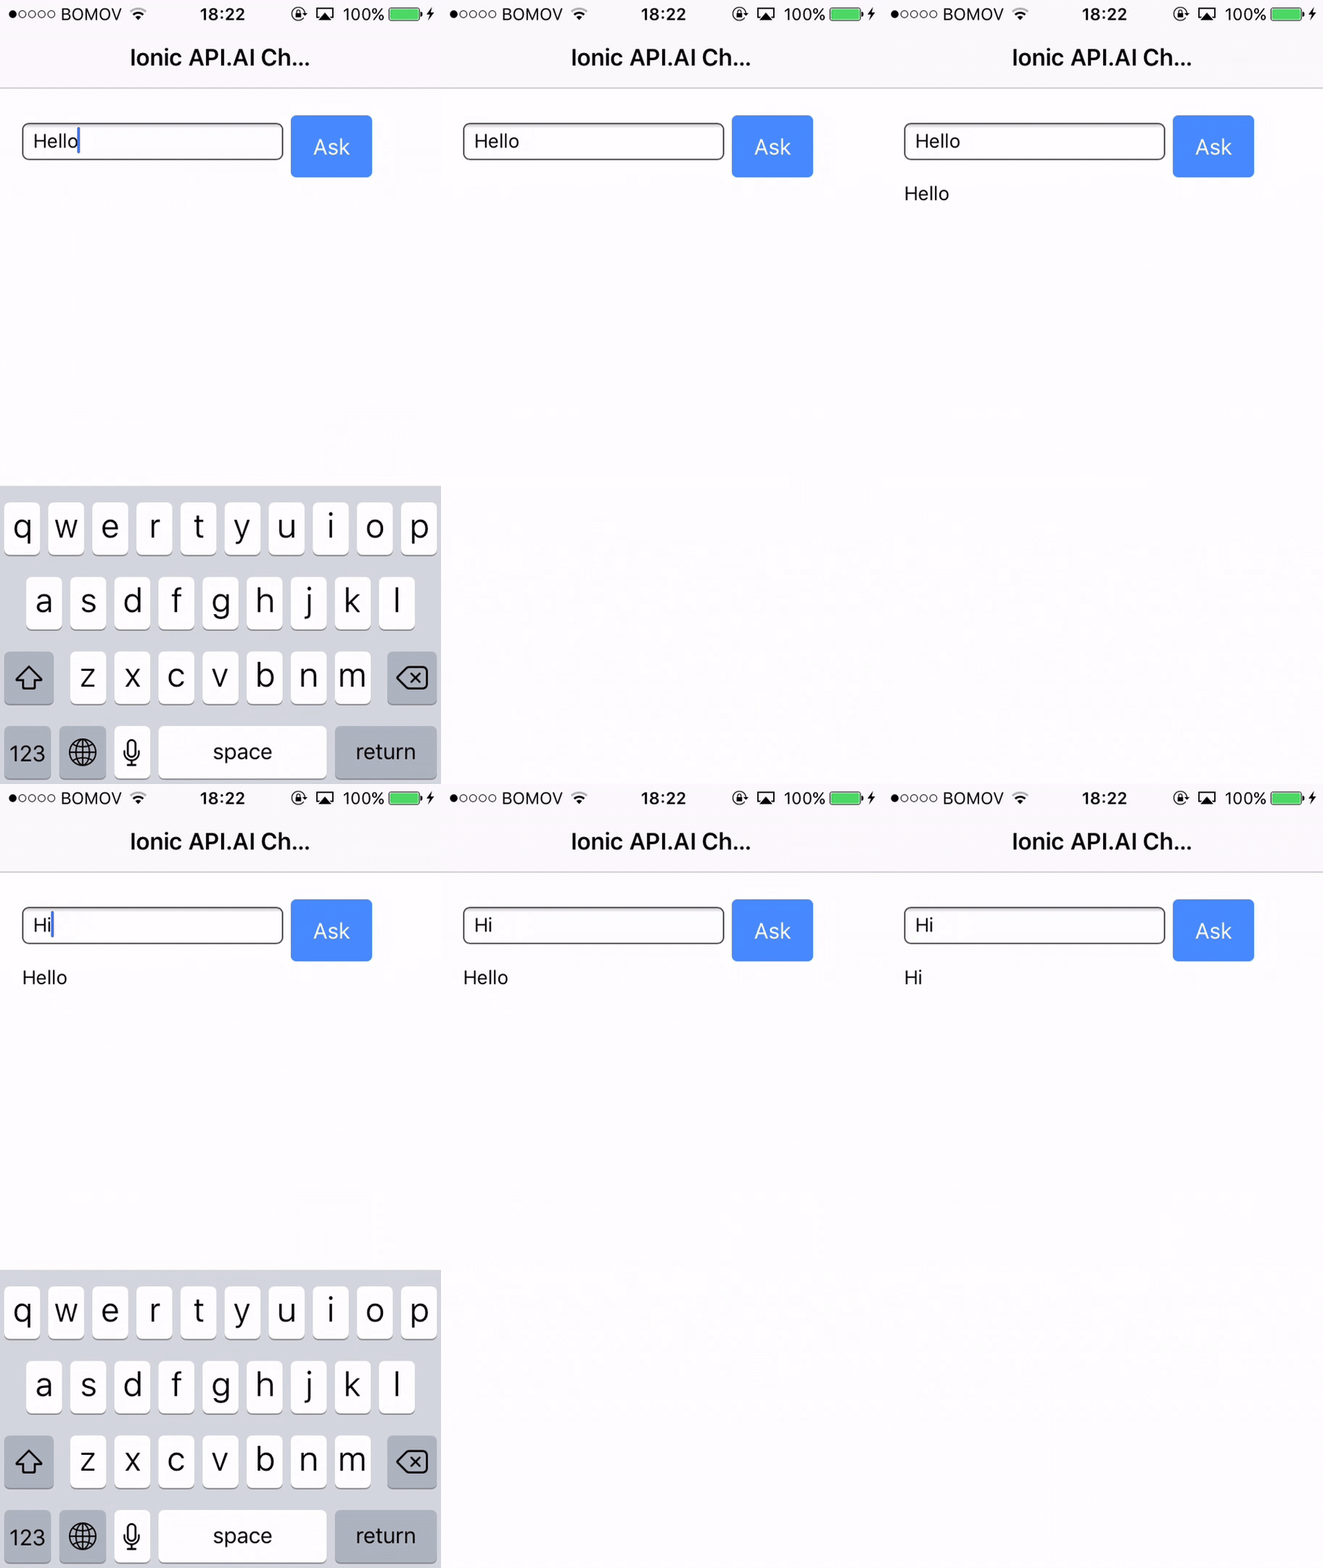
As I stated before, AI are dogs that need training.
There is a training section in Dialogflow that allows us to do it manually:
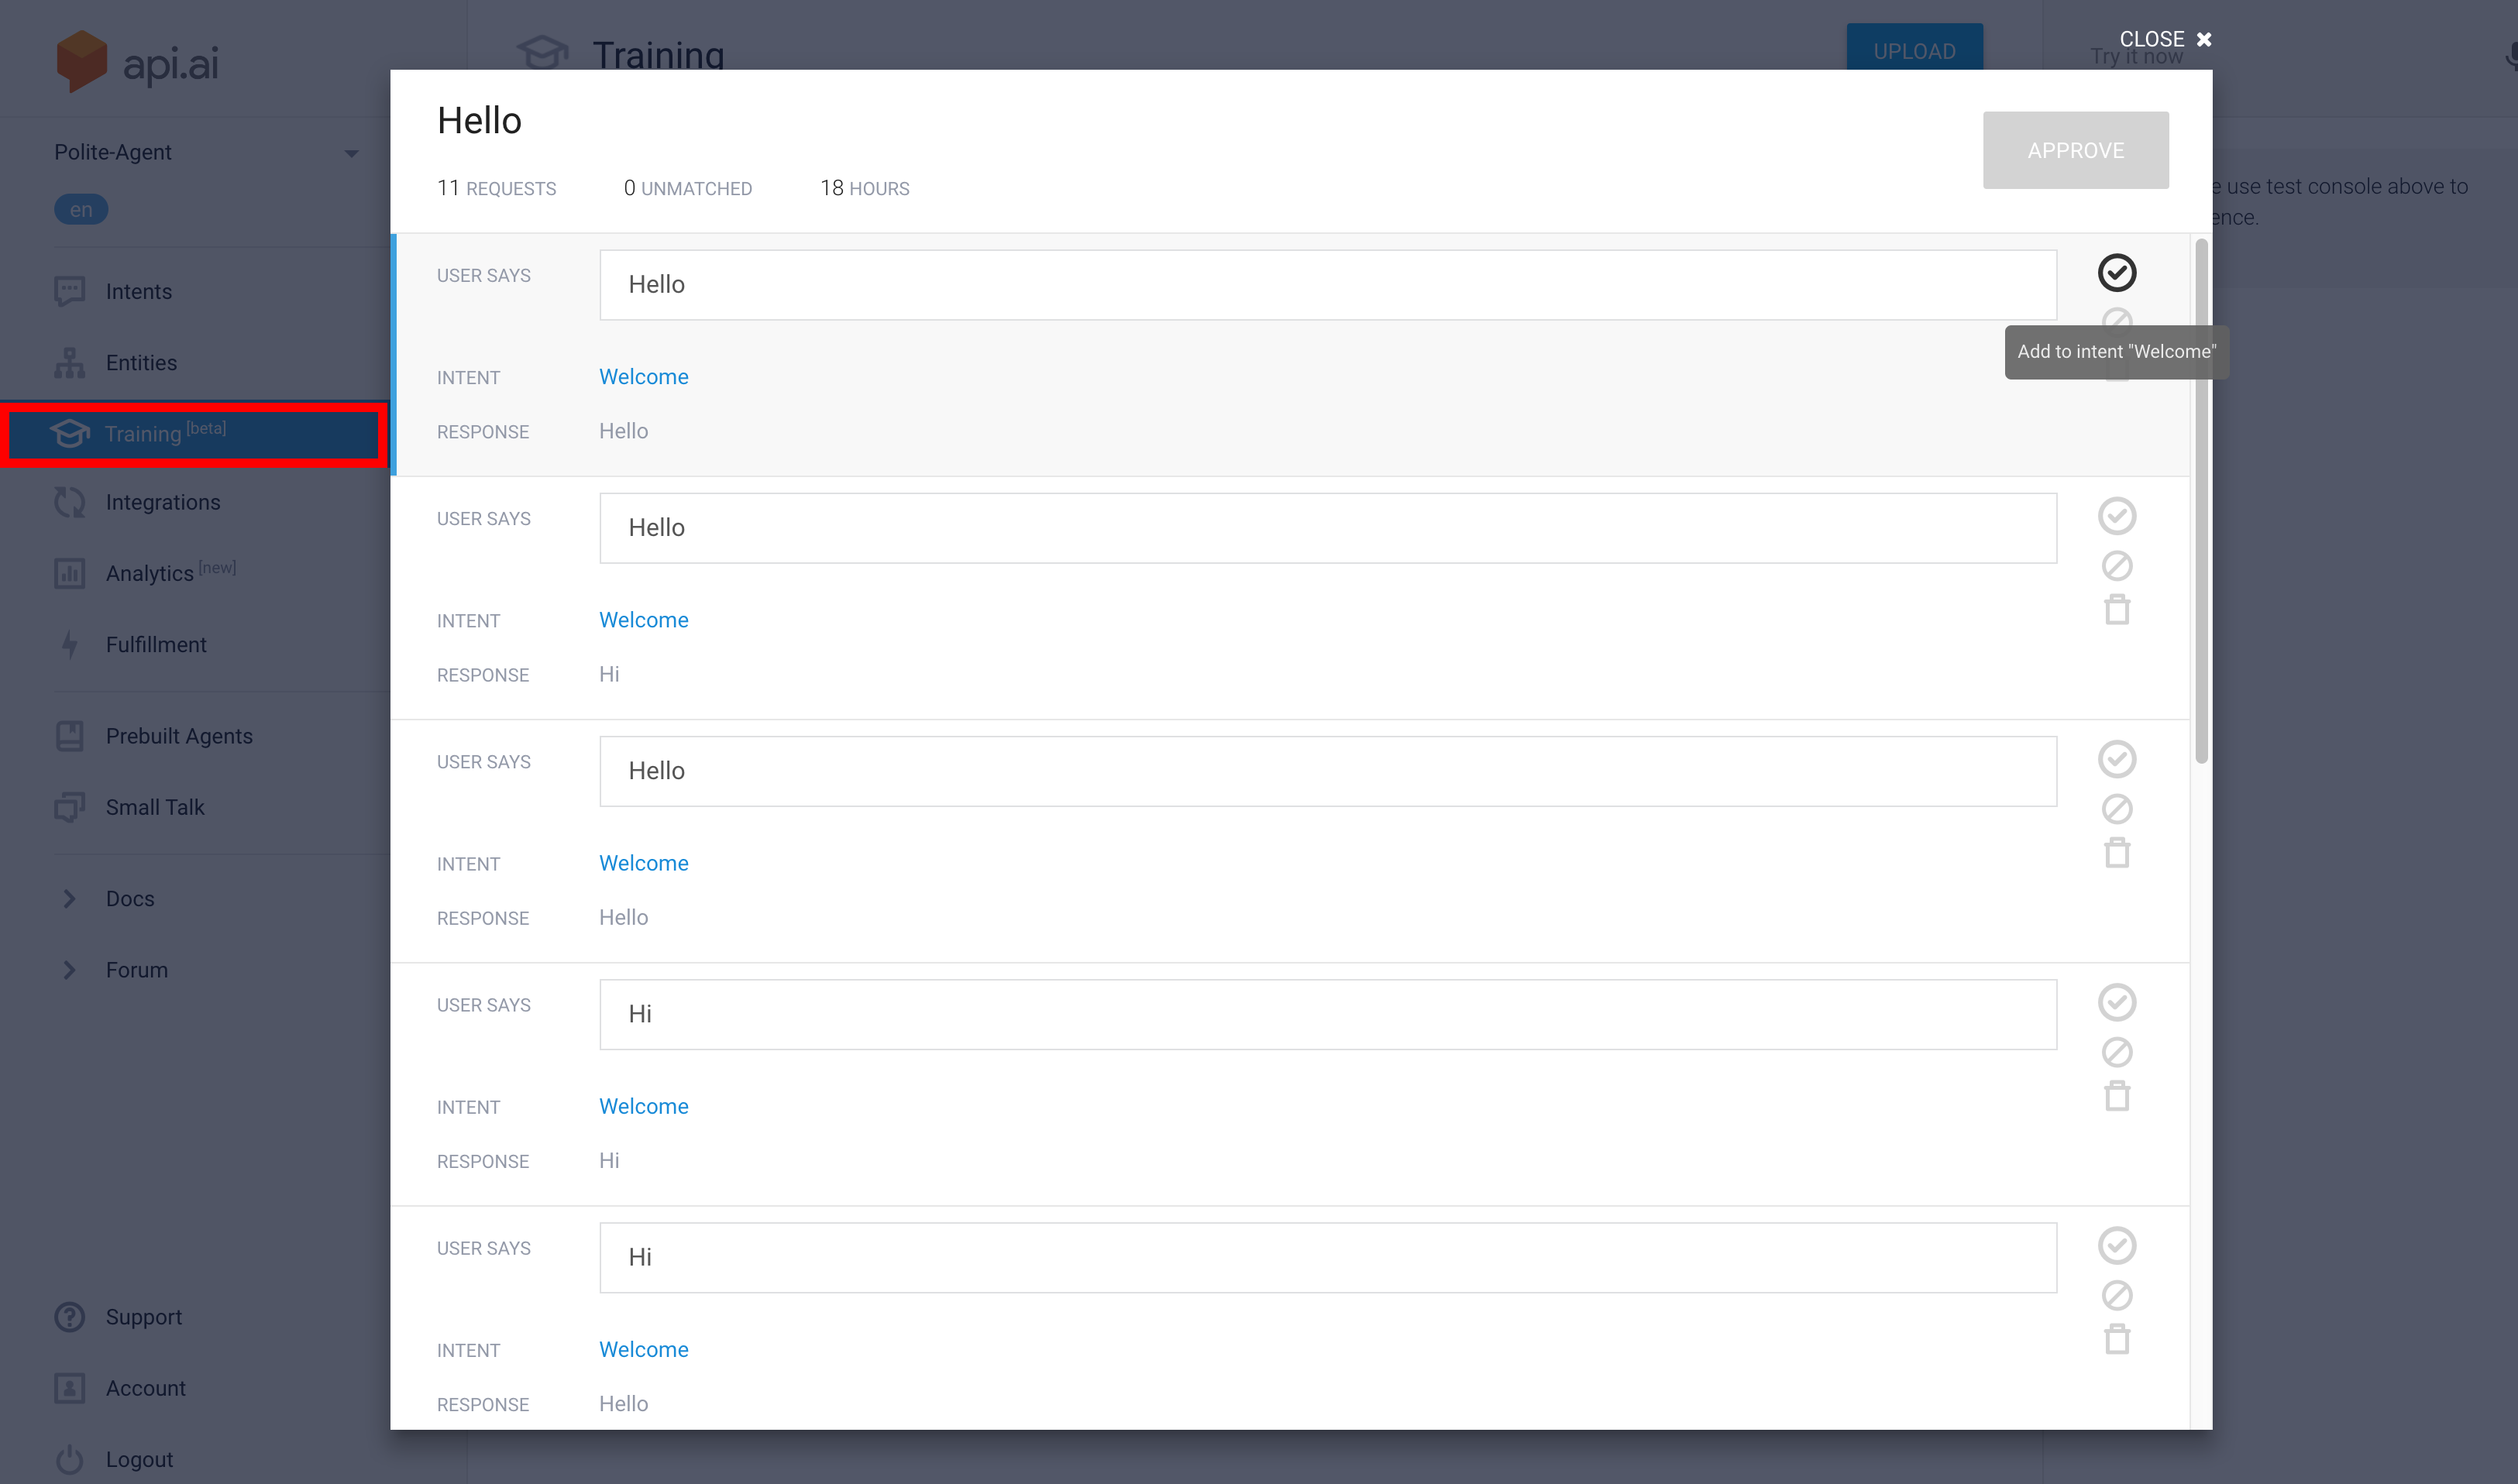
We can attach the user’s questions to other intents in order to tell our dog AI that something should be different.
In AI programming training is done by telling the AI over X iterations which answer should be matched to which data. I don’t have access to Dialogflow’s algorithm, it’s highly likely that by clicking this button, the agent is told 10000 times that “Hello” should be matched with the “Welcome” intent (we will dive deeper into this in another tutorial).
Spicing things up
Having an AI that can only say “Hello” and “Goodbye” is quite boring.
As a digital nomad, I have spent many hours/days in offices, grabbing tickets at counters waiting for my turn to get some information on visas and immigration related subjects.
All of those offices have 10-20 employees answering the same questions days after days.
Those processes can be improved by implementing AIs and that’s our new goal.
Let’s create a new Visa-Agent and a new Visa.check intent:

Here are the basic user inputs:

Visa processes can be quite complex, for now we will only care about:
- The country
- The city where the user will enter
- The city where the user will leave
- The user’s name
- The user’s surname
Those five requirements have something in common, they all have parameters that can be used by the AI.
Just like programming, we can see those sentences as:
- I need a visa for $country
- I will enter from $enteringCity
- I will leave from $leavingCity
- My name is $name
- My surname is $surname
Just like TypeScript, those parameters have types or if we follow Dialogflow naming convention: Entities.
Here are more complex user inputs that use those parameters:

We need to add them so our agent can detect and use them:
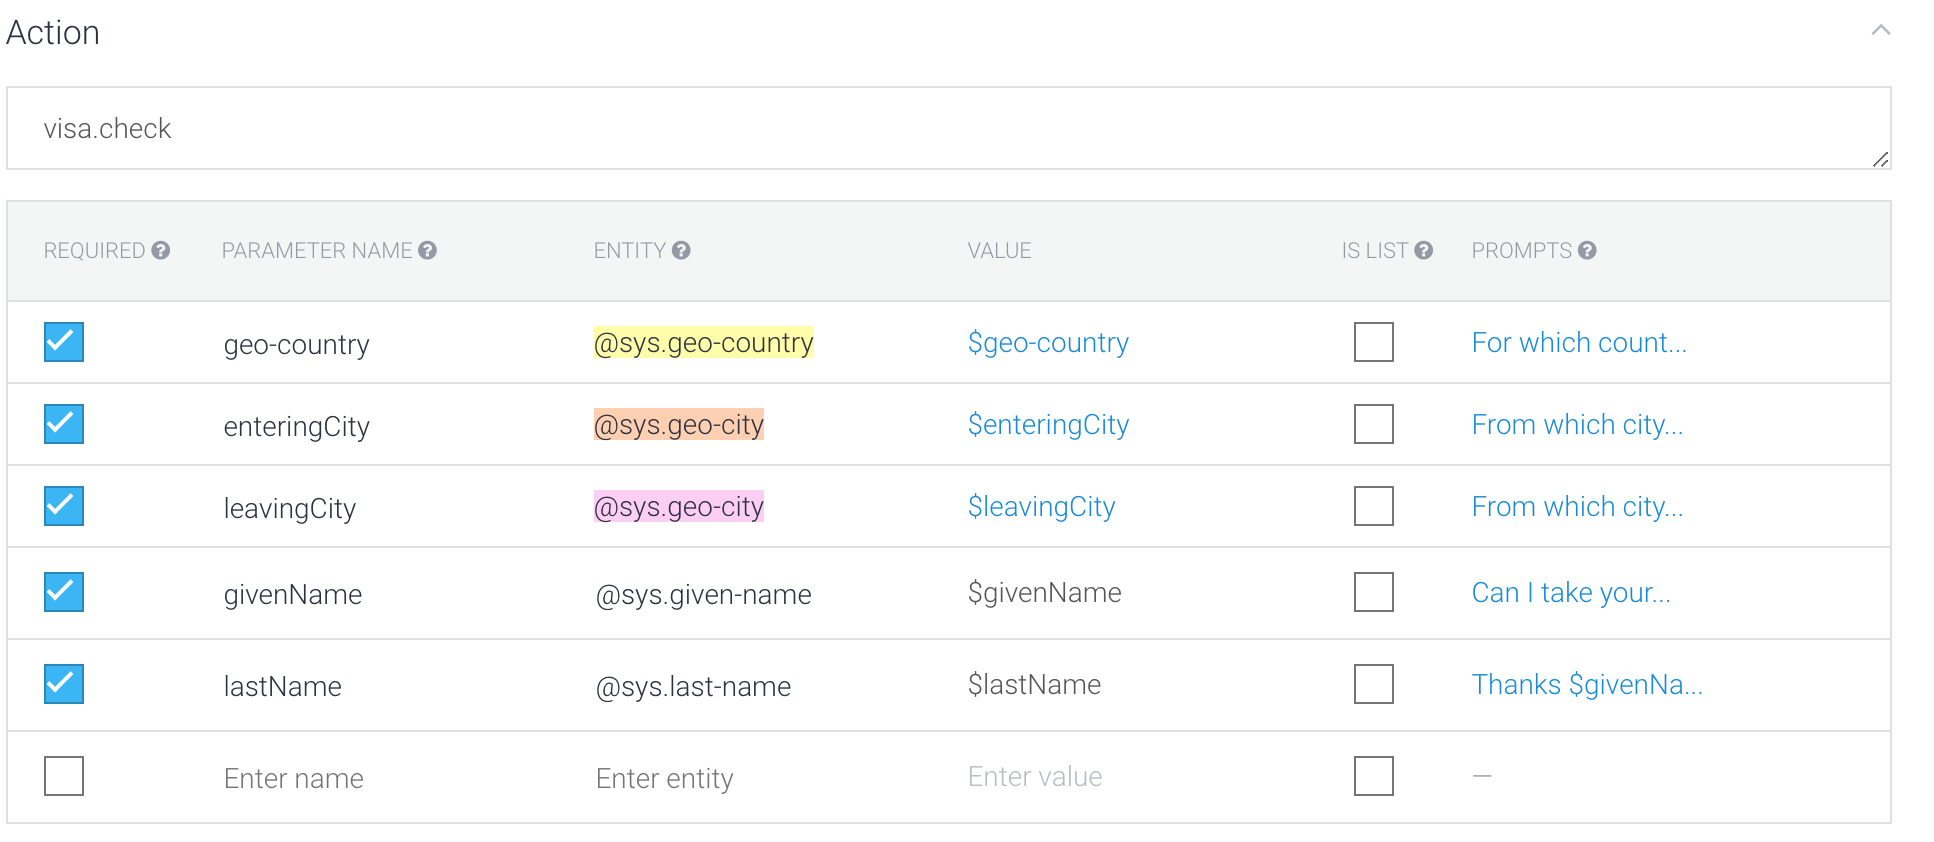
Those information are crucial to our visa process so we end up with mandatory parameters.
Those Entities are basic ones populated by Dialogflow. If a word (like France) belongs to an Entity, it will be recognized.
However, if that Entity is missing some information, the words won’t be recognized.
A very simple example here is the given-name Entity, if the user’s name isn’t in the database, it won’t be recognized and a new Entity will be required to match specific names like 和子 or Анастасия.
Those parameters will be asked with a priority order (top to bottom).
By clicking there:

The AI can use the following sentences to ask for the missing parameter:
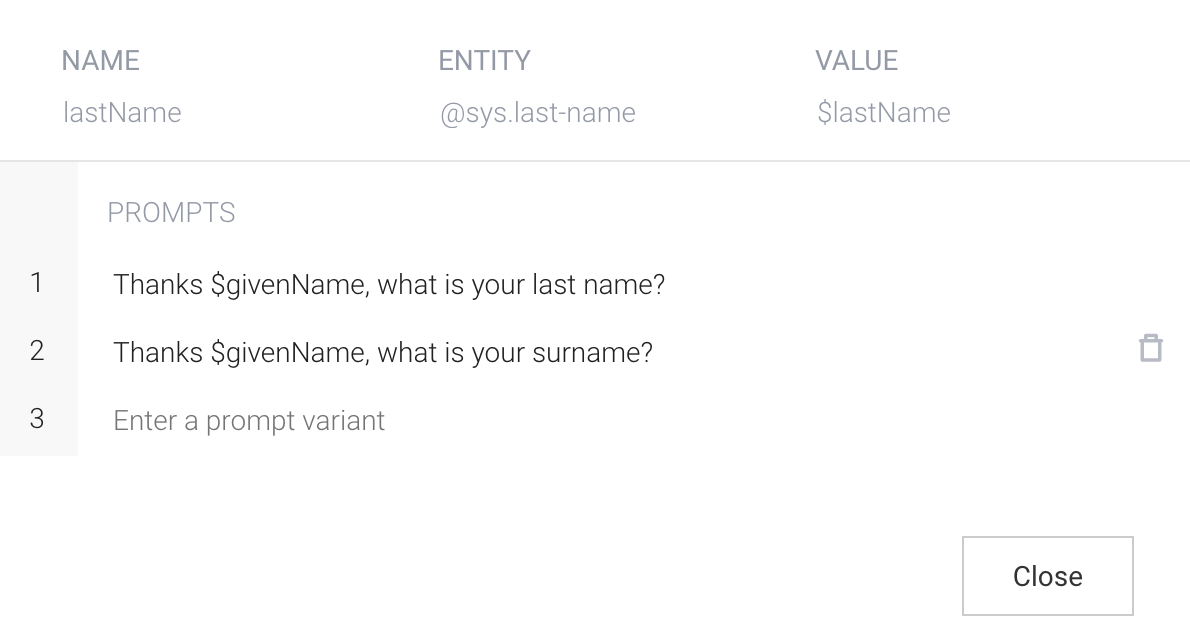
Since the givenName parameter has a higher priority, this information is already there for us to use in our question.
The Visa-Agent Artificial Intelligence can now ask and memorize in this order:
- The country
- The entering city
- The leaving city
- The user’s name
- The user’s surname
We can now connect it to the Ionic application.
Ionic Application Update
Our AI is smarter now and we can have a “real” conversation by updating the Ionic application.
Starting with the client access token:
ApiAIPromises.init({
  clientAccessToken: "996215250fd4438db3ff5cf9d5957c3e"
});
We will display the answers by using an ngFor in the home.html file:
  <div *ngFor="let answer of answers">
    {{answer}}
  </div>
Adding the answers property to the home.ts file:
export class HomePage {
  answers = [];
  ...
}
And pushing the answers there when Dialogflow’s server responds:
  ask(question) {
    ApiAIPromises.requestText({
      query: question
    })
    .then(({result: {fulfillment: {speech}}}) => {
       this.ngZone.run(()=> {
         this.answers.push(speech);
       });
    })
  }
We finally have our Visa-Chatbot working with Ionic!

Conclusion
An AI is only limited by the data that we provided and its algorithms. The AI usefulness will highly depend on the designed use cases, if an unexpected case is encountered the user can be redirected to a real employee.
As South Park, Humans and many work of arts are forecasting: more AI = less jobs.
One thing is sure, it’s better been of the side using AIs them than the one getting replaced by them.

